Viridian Clearline Fusion Sarking Bracket Kit | SB16 Range | VIR-SB16 | For Slate Roofs Without Tile Battens | Scottish Sarking Roof Solar
Viridian Clearline Fusion Sarking Bracket Kit | SB16 Range | VIR-SB16 | For Slate Roofs Without Tile Battens | Scottish Sarking Roof Solar
Sarking Board Roofs Scottish-Style Slate Roofs No Tile Battens Required Clearline Fusion System Portrait & Landscape 7 Variants Available Viridian Solar
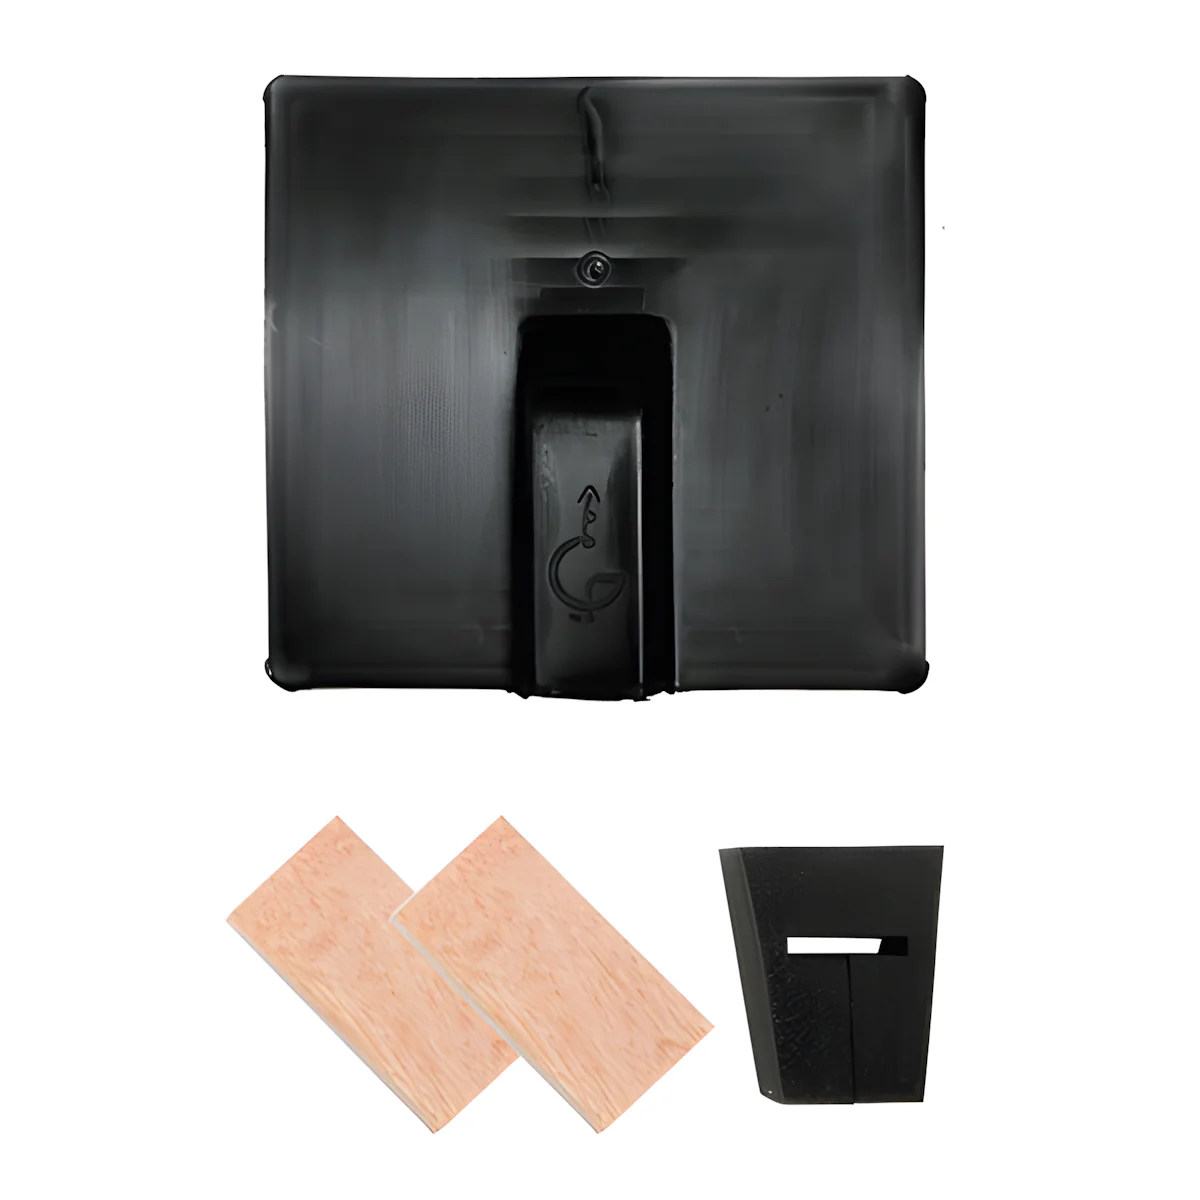
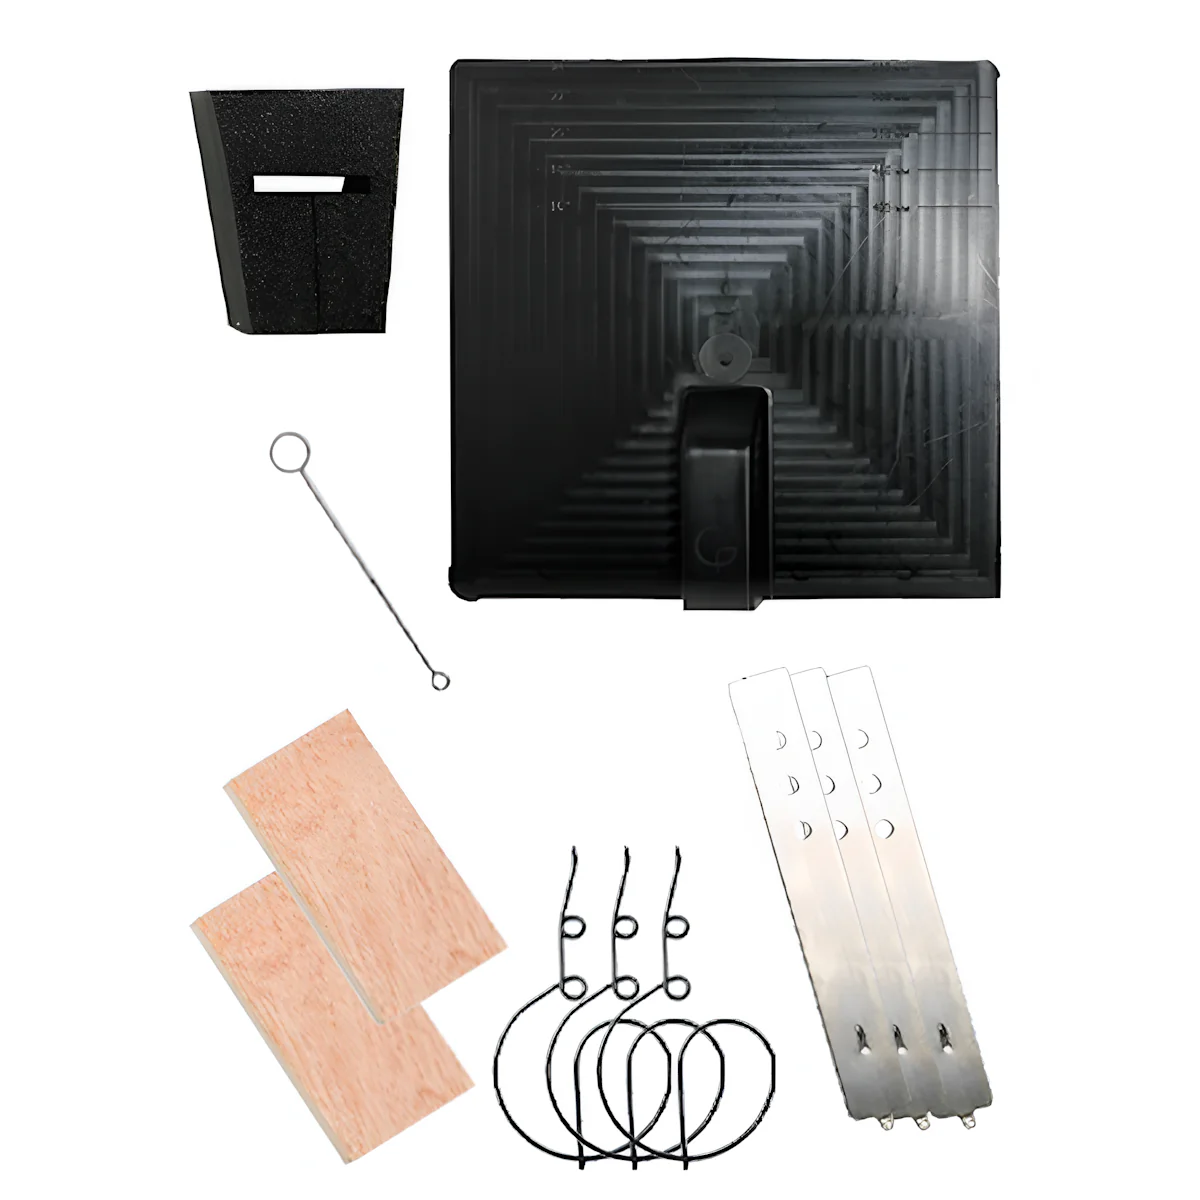
The Viridian Clearline Fusion Sarking Bracket Kit range allows Clearline PV16 solar panels to be installed on roofs without tile battens — specifically roofs where slates are fixed directly to timber sarking boards in the traditional Scottish style. Standard Clearline Fusion roofing kits include rafter brackets and combi-rafter brackets designed to bear against 25mm tile battens. On sarking board roofs, there are no battens to bear against, so these standard brackets are replaced with the appropriate Sarking Bracket Kit, which provides longer brackets that screw directly through the sarking deck into the rafters below. Each kit matches a specific Clearline Fusion flashing kit — select the correct variant for each flashing kit type in your array. Both portrait (F16-T) and landscape (F16-L) orientations are covered.
Why Sarking Bracket Kits Are Needed
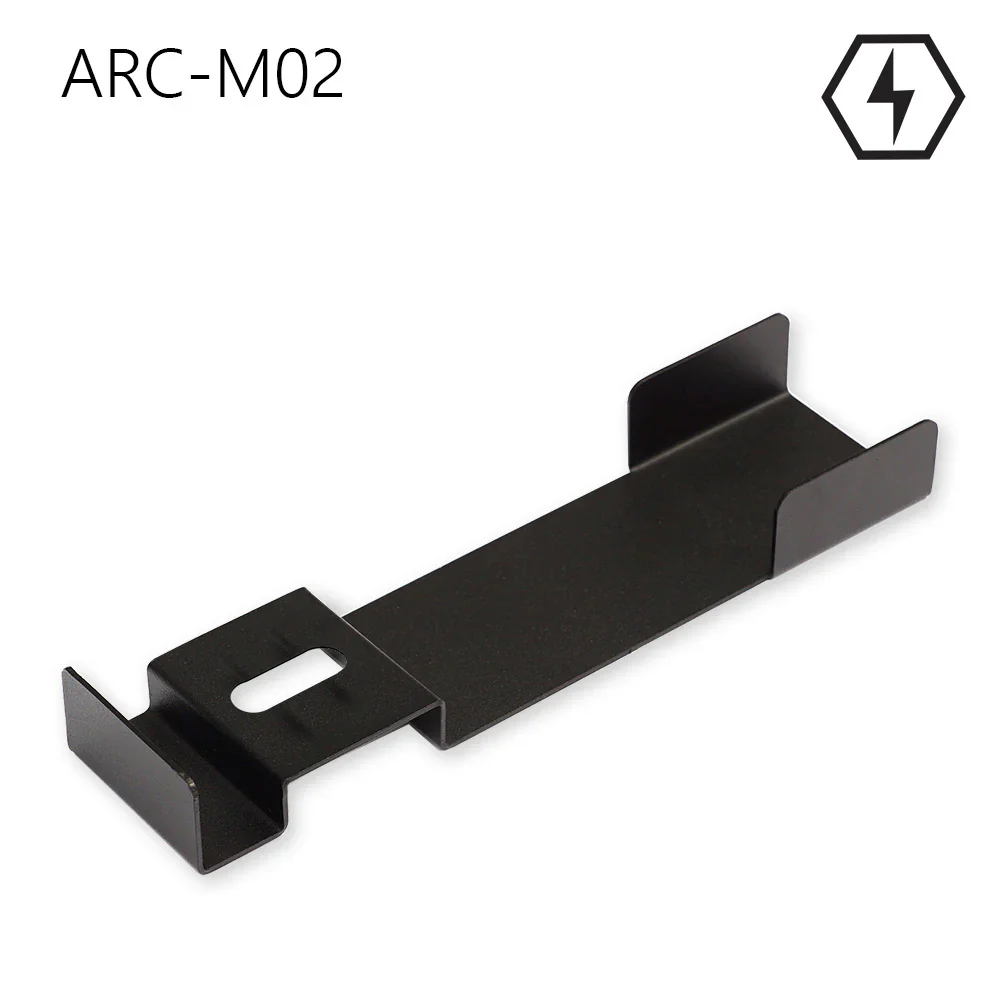
Clearline Fusion standard roofing kits include rafter brackets (item 12) and combi-rafter brackets (item 13), which are designed to fix to 25mm tile battens. On a sarking roof — common in Scotland and parts of Northern England — slates are laid directly onto close-boarded timber sarking without individual tile battens. The standard brackets have nowhere to bear against. Sarking bracket kits replace these brackets with longer variants that pass through the sarking board deck and screw into the rafters below, aligned so they cross the panel position. All other components of the standard flashing kit remain in use.
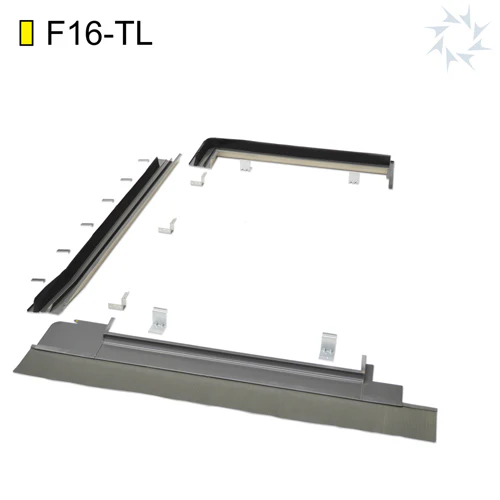
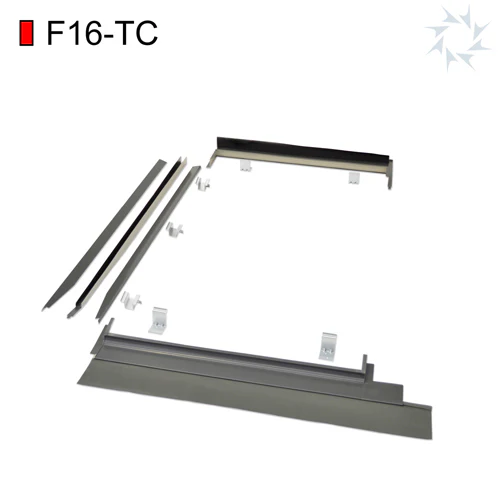
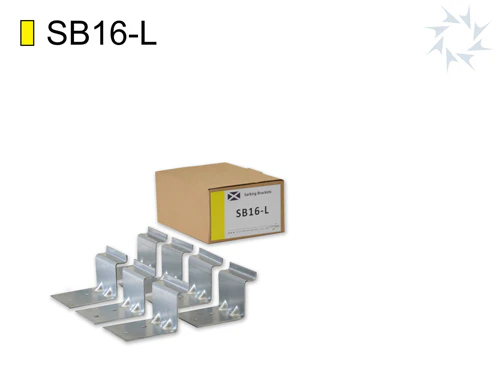
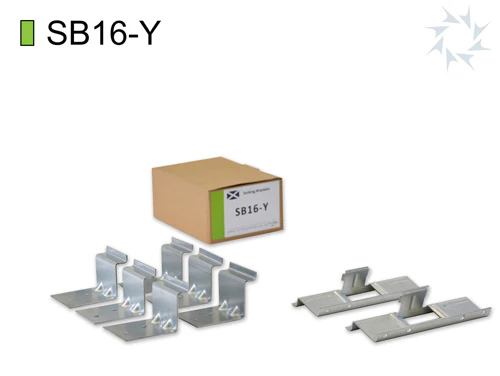
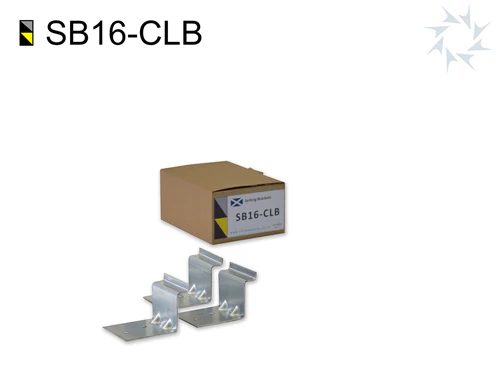
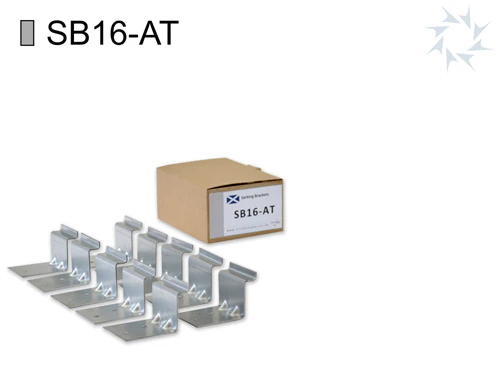
⚠️ Correct variant selection is critical. Each sarking bracket kit is matched to one specific flashing kit type. The F16-TC uses SB16-C; the F16-J uses SB16-J; the F16-TL uses SB16-L; the F16-TR uses SB16-R; and the F16-TY uses SB16-Y. For corner arrays, SB16-CLB pairs with F16-CLB/CLBS. For single-panel VAT16/VAL16 kits, use SB16-AT. Order one sarking bracket kit per flashing kit in your array.
Variant Selection — Which Kit Do You Need?
ℹ️ How to count kits: For an n×m array (n rows, m columns) in portrait orientation, the number of each flashing kit follows the formula on the Viridian installation drawing. For example, a 3×3 array needs: 1× TL, 1× TC, 1× TR, 2× TY, 4× J. You need one sarking bracket kit for every flashing kit of that type. Order sarking bracket kits in the same quantities as the corresponding flashing kits for your array size.
| MPN / SKU | Compatible Flashing Kit | Array Position | Portrait/Landscape | Kit Weight |
|---|---|---|---|---|
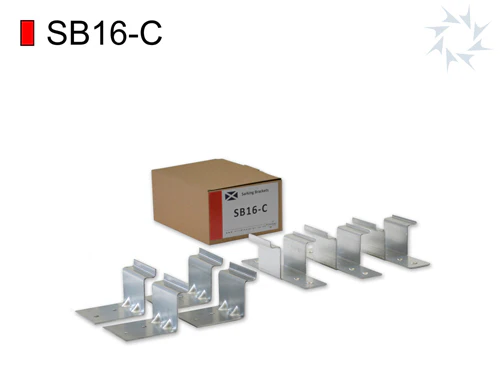
| VIR-SB16-C | F16-TC / F16-LC (Portrait & Landscape Centre) | Centre columns — interior bracket between two columns of panels | Portrait & Landscape | 0.75 kg |
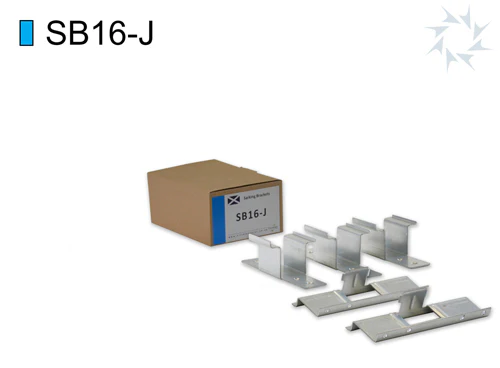
| VIR-SB16-J | F16-J / F16-LJ (Portrait & Landscape Joining) | Interior join — bracket at horizontal joint between rows within a column | Portrait & Landscape | ~0.8 kg |
| VIR-SB16-L | F16-TL / F16-LL (Portrait & Landscape Left) | Left-hand edge of the array | Portrait & Landscape | 0.60 kg |
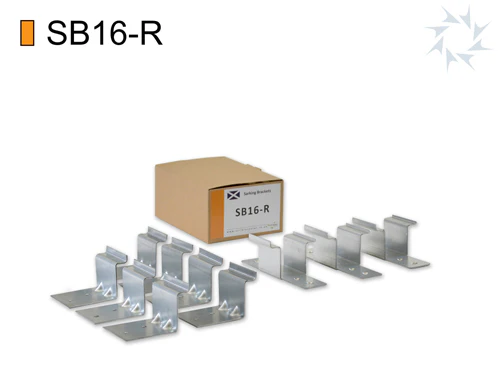
| VIR-SB16-R | F16-TR / F16-LR (Portrait & Landscape Right) | Right-hand edge of the array | Portrait & Landscape | 1.01 kg |
| VIR-SB16-Y | F16-TY / F16-LY (Portrait & Landscape Inter-column) | Between columns — combi-bracket at column junction | Portrait & Landscape | 0.78 kg |
| VIR-SB16-CLB | F16-CLB / F16-CLB-S (Corner Conversion — Left Bottom) | Left-bottom corner position in a stepped/L-shaped array | Portrait & Landscape | — |
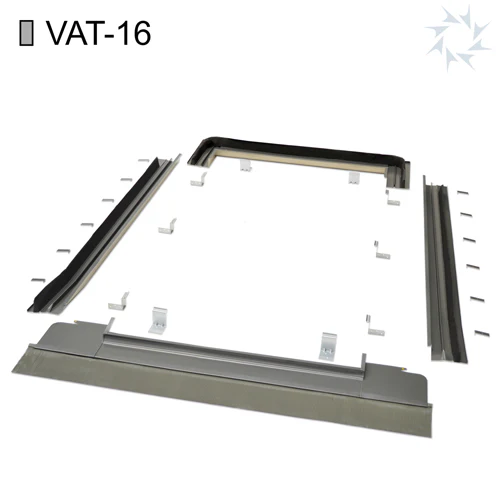
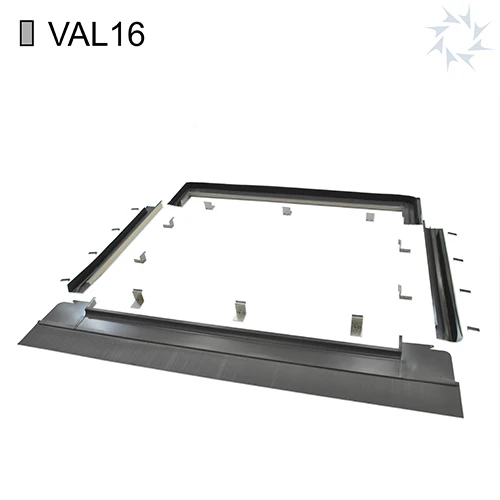
| VIR-SB16-AT | VAT16 (Portrait) / VAL16 (Landscape) single-panel kits | Standalone single-panel installations only | Portrait & Landscape | — |
Key Features
- ✓Enables Clearline Fusion installation on sarking board roofs — replaces standard rafter/combi-rafter brackets where no tile battens exist
- ✓Longer brackets screw into rafters through sarking deck — aligned to cross the panel position at each rafter; same structural performance as standard installation
- ✓Exact match to each flashing kit type — one variant per flashing kit (TL, TC, TR, TY, J, CLB/CLBS, and single-panel VAT16/VAL16)
- ✓Portrait and landscape compatible — each variant covers both F16-T (portrait) and F16-L (landscape) equivalents
- ✓Standard flashing components unchanged — only the rafter and combi-rafter brackets are replaced; all flashings, gutters, and seals remain from the standard kit
- ✓Ideal for Scottish-style slate roofs — the most common application; also suitable for any roof where sarking boards replace tile battens
- ✓Viridian Solar manufactured — system-matched components from the Clearline Fusion system manufacturer, ensuring compatibility and warranty compliance
- ✓Used alongside the full Clearline Fusion installation manual (80032) — sarking bracket installation follows the same procedure with bracket substitution only
- ✓MCS and BBA compliant installation — no change to the certified system performance when sarking brackets are used as specified
Installation Overview
⚠️ Read the full Clearline Fusion installation manual (80032) first. The sarking bracket kits are used as a direct substitution for items 12 (rafter bracket) and 13 (combi-rafter bracket) described in that manual. All other installation steps, including fitting flashings, gutters, joining strips, and top flashings, remain unchanged.
| 1 | Identify the roofing kits for your array: Count how many of each flashing kit type your array requires using the Viridian array planning diagram. Order one sarking bracket kit for each flashing kit of the matching type. |
| 2 | Prepare the sarking deck: Ensure sarking boards are sound and continuous. Identify rafter positions under the array — brackets must align to cross at least one rafter per panel. Mark rafter positions before laying slates. |
| 3 | Substitute sarking brackets for standard rafter brackets: When the installation manual instructs you to fix item 12 (rafter bracket) or item 13 (combi-rafter bracket), use the sarking bracket kit bracket instead. Align each bracket to screw through the sarking board and into the rafter below using the appropriate screws. |
| 4 | Complete the installation per the standard manual: All other steps — fitting sill flashings, side flashings, top flashings, gutters, joining strips, gutter covers, and tile supports — are performed exactly as described in the standard Clearline Fusion installation manual. |
| 5 | Fit slates around the array: Slate fixing around the array perimeter proceeds normally. The sarking brackets are concealed beneath the panel and flashing assembly once the array is complete. |
Technical Specifications
| Specification | Value |
|---|---|
| Manufacturer | Viridian Solar Ltd |
| System Compatibility | Clearline Fusion (Clearline PV16 modules — G1, M10) |
| Application | Roofs without tile battens — sarking board / direct-to-deck construction |
| Typical Use | Scottish-style slate roofs fixed to timber sarking boards |
| Panel Orientations | Portrait (F16-T range) and Landscape (F16-L range) |
| Fixing Method | Longer rafter/combi-rafter brackets screwed through sarking deck into rafters below |
| Standard Replaced | Items 12 (rafter bracket) and 13 (combi-rafter bracket) from standard Clearline Fusion roofing kits |
| Installation Reference | Clearline Fusion Installation Manual 80032 (v1.8); corners manual 80035 |
| System Pitch Range | 20° – 60° |
| Variants Available | SB16-C, SB16-J, SB16-L, SB16-R, SB16-Y, SB16-CLB, SB16-AT |
| Ordering Quantity | One sarking bracket kit per corresponding flashing kit in the array |
| Weight — SB16-C | 0.75 kg |
| Weight — SB16-L | 0.60 kg |
| Weight — SB16-R | 1.01 kg |
| Weight — SB16-Y | 0.78 kg |
| Weight — SB16-J / SB16-CLB / SB16-AT | Contact supplier for exact weights |
✅ Standard Clearline Fusion performance is maintained when sarking bracket kits are used as specified in the installation manual. The certified wind resistance, fire rating (BRoof Class B, T1–T4), and weathertightness of the Clearline Fusion system are not reduced by the substitution of sarking brackets for standard rafter brackets, provided brackets are correctly aligned to penetrate into the rafters.
Frequently Asked Questions
QWhat is a sarking roof and why do I need a different bracket?
A sarking roof — common in Scotland and parts of Northern England — uses timber sarking boards (close-boarded decking) instead of individual tile battens to carry the slates. Standard Clearline Fusion rafter brackets (item 12) and combi-rafter brackets (item 13) are designed to fix to 25mm tile battens. On a sarking roof, there are no battens, so these brackets are replaced with the sarking bracket kit versions, which are longer and screw directly through the sarking deck into the structural rafters below.
QDo I need a sarking bracket kit for every flashing kit in the array?
Yes — one sarking bracket kit is needed for every flashing kit of the matching type. For example, a 3×3 portrait array requires: 1× TL, 1× TC, 1× TR, 2× TY, 4× J flashing kits — so you would also need 1× SB16-L, 1× SB16-C, 1× SB16-R, 2× SB16-Y, and 4× SB16-J sarking bracket kits.
QWhich sarking bracket kit do I need for the TY inter-column position?
Use VIR-SB16-Y. The TY/LY kit handles the combi-bracket position at the junction between two adjacent columns of panels. In the standard installation (with tile battens), the TY flashing kit opens the Green Box step — the combi-rafter bracket (item 13) is replaced by the SB16-Y bracket on sarking roofs.
QCan I use these brackets for landscape installations?
Yes. Each variant covers both portrait and landscape orientations. SB16-L works with both F16-TL (portrait left) and F16-LL (landscape left); SB16-C with F16-TC and F16-LC; SB16-R with F16-TR and F16-LR; SB16-Y with F16-TY and F16-LY; and SB16-J with F16-J and F16-LJ.
QWhat about corner arrays (L-shaped or stepped)?
Corner arrays use the F16-CLB or F16-CLB-S (and landscape equivalents) from the Clearline Fusion Corner Conversion Kit range. The matching sarking bracket kit is VIR-SB16-CLB. Corner installation must be read in conjunction with the Corner Conversion Kit manual (80035) as well as the main installation manual (80032).
QWhat is the VAT16/VAL16 single-panel kit?
The VAT16 (portrait) and VAL16 (landscape) are Viridian's single-panel standalone flashing kits for installing individual Clearline PV16 modules with no other panels directly adjacent horizontally. They have their own dedicated rafter brackets, and on sarking roofs, VIR-SB16-AT replaces the standard VAT16/VAL16 brackets for direct sarking-to-rafter fixing.
QDoes using sarking brackets affect the warranty or certifications?
No. The sarking bracket kits are Viridian Solar's own system component, designed as a specified alternative within the Clearline Fusion installation manual. Using them as directed does not affect BBA certification, MCS compliance, or the wind resistance and fire rating of the Clearline Fusion system.
QDo I still need the standard flashing kit when I buy a sarking bracket kit?
Yes. The sarking bracket kit only replaces the rafter bracket (item 12) and combi-rafter bracket (item 13) from the standard flashing kit. You still need the full flashing kit for all other components — sill flashing, side flashings, top flashing, gutters, gutter covers, joining strips, batten brackets, combi-batten brackets, and fixings. The sarking bracket kit is an add-on substitution kit, not a replacement for the flashing kit.
Original: $14.85
-65%$14.85
$5.20More Images
Viridian Clearline Fusion Sarking Bracket Kit | SB16 Range | VIR-SB16 | For Slate Roofs Without Tile Battens | Scottish Sarking Roof Solar
Sarking Board Roofs Scottish-Style Slate Roofs No Tile Battens Required Clearline Fusion System Portrait & Landscape 7 Variants Available Viridian Solar
The Viridian Clearline Fusion Sarking Bracket Kit range allows Clearline PV16 solar panels to be installed on roofs without tile battens — specifically roofs where slates are fixed directly to timber sarking boards in the traditional Scottish style. Standard Clearline Fusion roofing kits include rafter brackets and combi-rafter brackets designed to bear against 25mm tile battens. On sarking board roofs, there are no battens to bear against, so these standard brackets are replaced with the appropriate Sarking Bracket Kit, which provides longer brackets that screw directly through the sarking deck into the rafters below. Each kit matches a specific Clearline Fusion flashing kit — select the correct variant for each flashing kit type in your array. Both portrait (F16-T) and landscape (F16-L) orientations are covered.
Why Sarking Bracket Kits Are Needed
Clearline Fusion standard roofing kits include rafter brackets (item 12) and combi-rafter brackets (item 13), which are designed to fix to 25mm tile battens. On a sarking roof — common in Scotland and parts of Northern England — slates are laid directly onto close-boarded timber sarking without individual tile battens. The standard brackets have nowhere to bear against. Sarking bracket kits replace these brackets with longer variants that pass through the sarking board deck and screw into the rafters below, aligned so they cross the panel position. All other components of the standard flashing kit remain in use.
⚠️ Correct variant selection is critical. Each sarking bracket kit is matched to one specific flashing kit type. The F16-TC uses SB16-C; the F16-J uses SB16-J; the F16-TL uses SB16-L; the F16-TR uses SB16-R; and the F16-TY uses SB16-Y. For corner arrays, SB16-CLB pairs with F16-CLB/CLBS. For single-panel VAT16/VAL16 kits, use SB16-AT. Order one sarking bracket kit per flashing kit in your array.
Variant Selection — Which Kit Do You Need?
ℹ️ How to count kits: For an n×m array (n rows, m columns) in portrait orientation, the number of each flashing kit follows the formula on the Viridian installation drawing. For example, a 3×3 array needs: 1× TL, 1× TC, 1× TR, 2× TY, 4× J. You need one sarking bracket kit for every flashing kit of that type. Order sarking bracket kits in the same quantities as the corresponding flashing kits for your array size.
| MPN / SKU | Compatible Flashing Kit | Array Position | Portrait/Landscape | Kit Weight |
|---|---|---|---|---|
| VIR-SB16-C | F16-TC / F16-LC (Portrait & Landscape Centre) | Centre columns — interior bracket between two columns of panels | Portrait & Landscape | 0.75 kg |
| VIR-SB16-J | F16-J / F16-LJ (Portrait & Landscape Joining) | Interior join — bracket at horizontal joint between rows within a column | Portrait & Landscape | ~0.8 kg |
| VIR-SB16-L | F16-TL / F16-LL (Portrait & Landscape Left) | Left-hand edge of the array | Portrait & Landscape | 0.60 kg |
| VIR-SB16-R | F16-TR / F16-LR (Portrait & Landscape Right) | Right-hand edge of the array | Portrait & Landscape | 1.01 kg |
| VIR-SB16-Y | F16-TY / F16-LY (Portrait & Landscape Inter-column) | Between columns — combi-bracket at column junction | Portrait & Landscape | 0.78 kg |
| VIR-SB16-CLB | F16-CLB / F16-CLB-S (Corner Conversion — Left Bottom) | Left-bottom corner position in a stepped/L-shaped array | Portrait & Landscape | — |
| VIR-SB16-AT | VAT16 (Portrait) / VAL16 (Landscape) single-panel kits | Standalone single-panel installations only | Portrait & Landscape | — |
Key Features
- ✓Enables Clearline Fusion installation on sarking board roofs — replaces standard rafter/combi-rafter brackets where no tile battens exist
- ✓Longer brackets screw into rafters through sarking deck — aligned to cross the panel position at each rafter; same structural performance as standard installation
- ✓Exact match to each flashing kit type — one variant per flashing kit (TL, TC, TR, TY, J, CLB/CLBS, and single-panel VAT16/VAL16)
- ✓Portrait and landscape compatible — each variant covers both F16-T (portrait) and F16-L (landscape) equivalents
- ✓Standard flashing components unchanged — only the rafter and combi-rafter brackets are replaced; all flashings, gutters, and seals remain from the standard kit
- ✓Ideal for Scottish-style slate roofs — the most common application; also suitable for any roof where sarking boards replace tile battens
- ✓Viridian Solar manufactured — system-matched components from the Clearline Fusion system manufacturer, ensuring compatibility and warranty compliance
- ✓Used alongside the full Clearline Fusion installation manual (80032) — sarking bracket installation follows the same procedure with bracket substitution only
- ✓MCS and BBA compliant installation — no change to the certified system performance when sarking brackets are used as specified
Installation Overview
⚠️ Read the full Clearline Fusion installation manual (80032) first. The sarking bracket kits are used as a direct substitution for items 12 (rafter bracket) and 13 (combi-rafter bracket) described in that manual. All other installation steps, including fitting flashings, gutters, joining strips, and top flashings, remain unchanged.
| 1 | Identify the roofing kits for your array: Count how many of each flashing kit type your array requires using the Viridian array planning diagram. Order one sarking bracket kit for each flashing kit of the matching type. |
| 2 | Prepare the sarking deck: Ensure sarking boards are sound and continuous. Identify rafter positions under the array — brackets must align to cross at least one rafter per panel. Mark rafter positions before laying slates. |
| 3 | Substitute sarking brackets for standard rafter brackets: When the installation manual instructs you to fix item 12 (rafter bracket) or item 13 (combi-rafter bracket), use the sarking bracket kit bracket instead. Align each bracket to screw through the sarking board and into the rafter below using the appropriate screws. |
| 4 | Complete the installation per the standard manual: All other steps — fitting sill flashings, side flashings, top flashings, gutters, joining strips, gutter covers, and tile supports — are performed exactly as described in the standard Clearline Fusion installation manual. |
| 5 | Fit slates around the array: Slate fixing around the array perimeter proceeds normally. The sarking brackets are concealed beneath the panel and flashing assembly once the array is complete. |
Technical Specifications
| Specification | Value |
|---|---|
| Manufacturer | Viridian Solar Ltd |
| System Compatibility | Clearline Fusion (Clearline PV16 modules — G1, M10) |
| Application | Roofs without tile battens — sarking board / direct-to-deck construction |
| Typical Use | Scottish-style slate roofs fixed to timber sarking boards |
| Panel Orientations | Portrait (F16-T range) and Landscape (F16-L range) |
| Fixing Method | Longer rafter/combi-rafter brackets screwed through sarking deck into rafters below |
| Standard Replaced | Items 12 (rafter bracket) and 13 (combi-rafter bracket) from standard Clearline Fusion roofing kits |
| Installation Reference | Clearline Fusion Installation Manual 80032 (v1.8); corners manual 80035 |
| System Pitch Range | 20° – 60° |
| Variants Available | SB16-C, SB16-J, SB16-L, SB16-R, SB16-Y, SB16-CLB, SB16-AT |
| Ordering Quantity | One sarking bracket kit per corresponding flashing kit in the array |
| Weight — SB16-C | 0.75 kg |
| Weight — SB16-L | 0.60 kg |
| Weight — SB16-R | 1.01 kg |
| Weight — SB16-Y | 0.78 kg |
| Weight — SB16-J / SB16-CLB / SB16-AT | Contact supplier for exact weights |
✅ Standard Clearline Fusion performance is maintained when sarking bracket kits are used as specified in the installation manual. The certified wind resistance, fire rating (BRoof Class B, T1–T4), and weathertightness of the Clearline Fusion system are not reduced by the substitution of sarking brackets for standard rafter brackets, provided brackets are correctly aligned to penetrate into the rafters.
Frequently Asked Questions
QWhat is a sarking roof and why do I need a different bracket?
A sarking roof — common in Scotland and parts of Northern England — uses timber sarking boards (close-boarded decking) instead of individual tile battens to carry the slates. Standard Clearline Fusion rafter brackets (item 12) and combi-rafter brackets (item 13) are designed to fix to 25mm tile battens. On a sarking roof, there are no battens, so these brackets are replaced with the sarking bracket kit versions, which are longer and screw directly through the sarking deck into the structural rafters below.
QDo I need a sarking bracket kit for every flashing kit in the array?
Yes — one sarking bracket kit is needed for every flashing kit of the matching type. For example, a 3×3 portrait array requires: 1× TL, 1× TC, 1× TR, 2× TY, 4× J flashing kits — so you would also need 1× SB16-L, 1× SB16-C, 1× SB16-R, 2× SB16-Y, and 4× SB16-J sarking bracket kits.
QWhich sarking bracket kit do I need for the TY inter-column position?
Use VIR-SB16-Y. The TY/LY kit handles the combi-bracket position at the junction between two adjacent columns of panels. In the standard installation (with tile battens), the TY flashing kit opens the Green Box step — the combi-rafter bracket (item 13) is replaced by the SB16-Y bracket on sarking roofs.
QCan I use these brackets for landscape installations?
Yes. Each variant covers both portrait and landscape orientations. SB16-L works with both F16-TL (portrait left) and F16-LL (landscape left); SB16-C with F16-TC and F16-LC; SB16-R with F16-TR and F16-LR; SB16-Y with F16-TY and F16-LY; and SB16-J with F16-J and F16-LJ.
QWhat about corner arrays (L-shaped or stepped)?
Corner arrays use the F16-CLB or F16-CLB-S (and landscape equivalents) from the Clearline Fusion Corner Conversion Kit range. The matching sarking bracket kit is VIR-SB16-CLB. Corner installation must be read in conjunction with the Corner Conversion Kit manual (80035) as well as the main installation manual (80032).
QWhat is the VAT16/VAL16 single-panel kit?
The VAT16 (portrait) and VAL16 (landscape) are Viridian's single-panel standalone flashing kits for installing individual Clearline PV16 modules with no other panels directly adjacent horizontally. They have their own dedicated rafter brackets, and on sarking roofs, VIR-SB16-AT replaces the standard VAT16/VAL16 brackets for direct sarking-to-rafter fixing.
QDoes using sarking brackets affect the warranty or certifications?
No. The sarking bracket kits are Viridian Solar's own system component, designed as a specified alternative within the Clearline Fusion installation manual. Using them as directed does not affect BBA certification, MCS compliance, or the wind resistance and fire rating of the Clearline Fusion system.
QDo I still need the standard flashing kit when I buy a sarking bracket kit?
Yes. The sarking bracket kit only replaces the rafter bracket (item 12) and combi-rafter bracket (item 13) from the standard flashing kit. You still need the full flashing kit for all other components — sill flashing, side flashings, top flashing, gutters, gutter covers, joining strips, batten brackets, combi-batten brackets, and fixings. The sarking bracket kit is an add-on substitution kit, not a replacement for the flashing kit.
Product Information
Product Information
Shipping & Returns
Shipping & Returns
Description
Sarking Board Roofs Scottish-Style Slate Roofs No Tile Battens Required Clearline Fusion System Portrait & Landscape 7 Variants Available Viridian Solar
The Viridian Clearline Fusion Sarking Bracket Kit range allows Clearline PV16 solar panels to be installed on roofs without tile battens — specifically roofs where slates are fixed directly to timber sarking boards in the traditional Scottish style. Standard Clearline Fusion roofing kits include rafter brackets and combi-rafter brackets designed to bear against 25mm tile battens. On sarking board roofs, there are no battens to bear against, so these standard brackets are replaced with the appropriate Sarking Bracket Kit, which provides longer brackets that screw directly through the sarking deck into the rafters below. Each kit matches a specific Clearline Fusion flashing kit — select the correct variant for each flashing kit type in your array. Both portrait (F16-T) and landscape (F16-L) orientations are covered.
Why Sarking Bracket Kits Are Needed
Clearline Fusion standard roofing kits include rafter brackets (item 12) and combi-rafter brackets (item 13), which are designed to fix to 25mm tile battens. On a sarking roof — common in Scotland and parts of Northern England — slates are laid directly onto close-boarded timber sarking without individual tile battens. The standard brackets have nowhere to bear against. Sarking bracket kits replace these brackets with longer variants that pass through the sarking board deck and screw into the rafters below, aligned so they cross the panel position. All other components of the standard flashing kit remain in use.
⚠️ Correct variant selection is critical. Each sarking bracket kit is matched to one specific flashing kit type. The F16-TC uses SB16-C; the F16-J uses SB16-J; the F16-TL uses SB16-L; the F16-TR uses SB16-R; and the F16-TY uses SB16-Y. For corner arrays, SB16-CLB pairs with F16-CLB/CLBS. For single-panel VAT16/VAL16 kits, use SB16-AT. Order one sarking bracket kit per flashing kit in your array.
Variant Selection — Which Kit Do You Need?
ℹ️ How to count kits: For an n×m array (n rows, m columns) in portrait orientation, the number of each flashing kit follows the formula on the Viridian installation drawing. For example, a 3×3 array needs: 1× TL, 1× TC, 1× TR, 2× TY, 4× J. You need one sarking bracket kit for every flashing kit of that type. Order sarking bracket kits in the same quantities as the corresponding flashing kits for your array size.
| MPN / SKU | Compatible Flashing Kit | Array Position | Portrait/Landscape | Kit Weight |
|---|---|---|---|---|
| VIR-SB16-C | F16-TC / F16-LC (Portrait & Landscape Centre) | Centre columns — interior bracket between two columns of panels | Portrait & Landscape | 0.75 kg |
| VIR-SB16-J | F16-J / F16-LJ (Portrait & Landscape Joining) | Interior join — bracket at horizontal joint between rows within a column | Portrait & Landscape | ~0.8 kg |
| VIR-SB16-L | F16-TL / F16-LL (Portrait & Landscape Left) | Left-hand edge of the array | Portrait & Landscape | 0.60 kg |
| VIR-SB16-R | F16-TR / F16-LR (Portrait & Landscape Right) | Right-hand edge of the array | Portrait & Landscape | 1.01 kg |
| VIR-SB16-Y | F16-TY / F16-LY (Portrait & Landscape Inter-column) | Between columns — combi-bracket at column junction | Portrait & Landscape | 0.78 kg |
| VIR-SB16-CLB | F16-CLB / F16-CLB-S (Corner Conversion — Left Bottom) | Left-bottom corner position in a stepped/L-shaped array | Portrait & Landscape | — |
| VIR-SB16-AT | VAT16 (Portrait) / VAL16 (Landscape) single-panel kits | Standalone single-panel installations only | Portrait & Landscape | — |
Key Features
- ✓Enables Clearline Fusion installation on sarking board roofs — replaces standard rafter/combi-rafter brackets where no tile battens exist
- ✓Longer brackets screw into rafters through sarking deck — aligned to cross the panel position at each rafter; same structural performance as standard installation
- ✓Exact match to each flashing kit type — one variant per flashing kit (TL, TC, TR, TY, J, CLB/CLBS, and single-panel VAT16/VAL16)
- ✓Portrait and landscape compatible — each variant covers both F16-T (portrait) and F16-L (landscape) equivalents
- ✓Standard flashing components unchanged — only the rafter and combi-rafter brackets are replaced; all flashings, gutters, and seals remain from the standard kit
- ✓Ideal for Scottish-style slate roofs — the most common application; also suitable for any roof where sarking boards replace tile battens
- ✓Viridian Solar manufactured — system-matched components from the Clearline Fusion system manufacturer, ensuring compatibility and warranty compliance
- ✓Used alongside the full Clearline Fusion installation manual (80032) — sarking bracket installation follows the same procedure with bracket substitution only
- ✓MCS and BBA compliant installation — no change to the certified system performance when sarking brackets are used as specified
Installation Overview
⚠️ Read the full Clearline Fusion installation manual (80032) first. The sarking bracket kits are used as a direct substitution for items 12 (rafter bracket) and 13 (combi-rafter bracket) described in that manual. All other installation steps, including fitting flashings, gutters, joining strips, and top flashings, remain unchanged.
| 1 | Identify the roofing kits for your array: Count how many of each flashing kit type your array requires using the Viridian array planning diagram. Order one sarking bracket kit for each flashing kit of the matching type. |
| 2 | Prepare the sarking deck: Ensure sarking boards are sound and continuous. Identify rafter positions under the array — brackets must align to cross at least one rafter per panel. Mark rafter positions before laying slates. |
| 3 | Substitute sarking brackets for standard rafter brackets: When the installation manual instructs you to fix item 12 (rafter bracket) or item 13 (combi-rafter bracket), use the sarking bracket kit bracket instead. Align each bracket to screw through the sarking board and into the rafter below using the appropriate screws. |
| 4 | Complete the installation per the standard manual: All other steps — fitting sill flashings, side flashings, top flashings, gutters, joining strips, gutter covers, and tile supports — are performed exactly as described in the standard Clearline Fusion installation manual. |
| 5 | Fit slates around the array: Slate fixing around the array perimeter proceeds normally. The sarking brackets are concealed beneath the panel and flashing assembly once the array is complete. |
Technical Specifications
| Specification | Value |
|---|---|
| Manufacturer | Viridian Solar Ltd |
| System Compatibility | Clearline Fusion (Clearline PV16 modules — G1, M10) |
| Application | Roofs without tile battens — sarking board / direct-to-deck construction |
| Typical Use | Scottish-style slate roofs fixed to timber sarking boards |
| Panel Orientations | Portrait (F16-T range) and Landscape (F16-L range) |
| Fixing Method | Longer rafter/combi-rafter brackets screwed through sarking deck into rafters below |
| Standard Replaced | Items 12 (rafter bracket) and 13 (combi-rafter bracket) from standard Clearline Fusion roofing kits |
| Installation Reference | Clearline Fusion Installation Manual 80032 (v1.8); corners manual 80035 |
| System Pitch Range | 20° – 60° |
| Variants Available | SB16-C, SB16-J, SB16-L, SB16-R, SB16-Y, SB16-CLB, SB16-AT |
| Ordering Quantity | One sarking bracket kit per corresponding flashing kit in the array |
| Weight — SB16-C | 0.75 kg |
| Weight — SB16-L | 0.60 kg |
| Weight — SB16-R | 1.01 kg |
| Weight — SB16-Y | 0.78 kg |
| Weight — SB16-J / SB16-CLB / SB16-AT | Contact supplier for exact weights |
✅ Standard Clearline Fusion performance is maintained when sarking bracket kits are used as specified in the installation manual. The certified wind resistance, fire rating (BRoof Class B, T1–T4), and weathertightness of the Clearline Fusion system are not reduced by the substitution of sarking brackets for standard rafter brackets, provided brackets are correctly aligned to penetrate into the rafters.
Frequently Asked Questions
QWhat is a sarking roof and why do I need a different bracket?
A sarking roof — common in Scotland and parts of Northern England — uses timber sarking boards (close-boarded decking) instead of individual tile battens to carry the slates. Standard Clearline Fusion rafter brackets (item 12) and combi-rafter brackets (item 13) are designed to fix to 25mm tile battens. On a sarking roof, there are no battens, so these brackets are replaced with the sarking bracket kit versions, which are longer and screw directly through the sarking deck into the structural rafters below.
QDo I need a sarking bracket kit for every flashing kit in the array?
Yes — one sarking bracket kit is needed for every flashing kit of the matching type. For example, a 3×3 portrait array requires: 1× TL, 1× TC, 1× TR, 2× TY, 4× J flashing kits — so you would also need 1× SB16-L, 1× SB16-C, 1× SB16-R, 2× SB16-Y, and 4× SB16-J sarking bracket kits.
QWhich sarking bracket kit do I need for the TY inter-column position?
Use VIR-SB16-Y. The TY/LY kit handles the combi-bracket position at the junction between two adjacent columns of panels. In the standard installation (with tile battens), the TY flashing kit opens the Green Box step — the combi-rafter bracket (item 13) is replaced by the SB16-Y bracket on sarking roofs.
QCan I use these brackets for landscape installations?
Yes. Each variant covers both portrait and landscape orientations. SB16-L works with both F16-TL (portrait left) and F16-LL (landscape left); SB16-C with F16-TC and F16-LC; SB16-R with F16-TR and F16-LR; SB16-Y with F16-TY and F16-LY; and SB16-J with F16-J and F16-LJ.
QWhat about corner arrays (L-shaped or stepped)?
Corner arrays use the F16-CLB or F16-CLB-S (and landscape equivalents) from the Clearline Fusion Corner Conversion Kit range. The matching sarking bracket kit is VIR-SB16-CLB. Corner installation must be read in conjunction with the Corner Conversion Kit manual (80035) as well as the main installation manual (80032).
QWhat is the VAT16/VAL16 single-panel kit?
The VAT16 (portrait) and VAL16 (landscape) are Viridian's single-panel standalone flashing kits for installing individual Clearline PV16 modules with no other panels directly adjacent horizontally. They have their own dedicated rafter brackets, and on sarking roofs, VIR-SB16-AT replaces the standard VAT16/VAL16 brackets for direct sarking-to-rafter fixing.
QDoes using sarking brackets affect the warranty or certifications?
No. The sarking bracket kits are Viridian Solar's own system component, designed as a specified alternative within the Clearline Fusion installation manual. Using them as directed does not affect BBA certification, MCS compliance, or the wind resistance and fire rating of the Clearline Fusion system.
QDo I still need the standard flashing kit when I buy a sarking bracket kit?
Yes. The sarking bracket kit only replaces the rafter bracket (item 12) and combi-rafter bracket (item 13) from the standard flashing kit. You still need the full flashing kit for all other components — sill flashing, side flashings, top flashing, gutters, gutter covers, joining strips, batten brackets, combi-batten brackets, and fixings. The sarking bracket kit is an add-on substitution kit, not a replacement for the flashing kit.