Taurus Wet Room Tray Former Installation Kit | Fix-KST Adhesive, Pro-Seal, Waterproof Tape & Internal Corners
Taurus Wet Room Tray Former Installation Kit | Fix-KST Adhesive, Pro-Seal, Waterproof Tape & Internal Corners
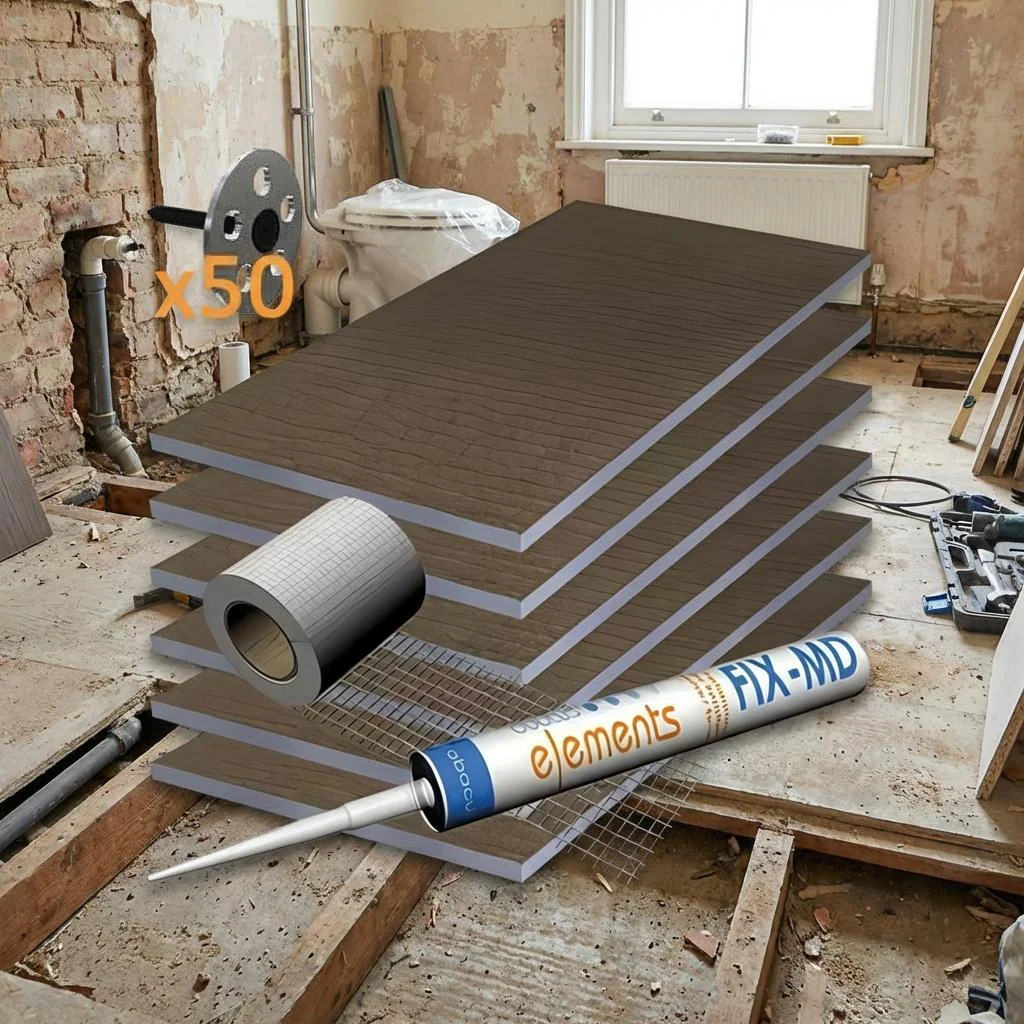
Tray Former Installation Fix-KST 5kg Adhesive Pro-Seal 500ml 5m Waterproof Tape Complete — All Consumables Included
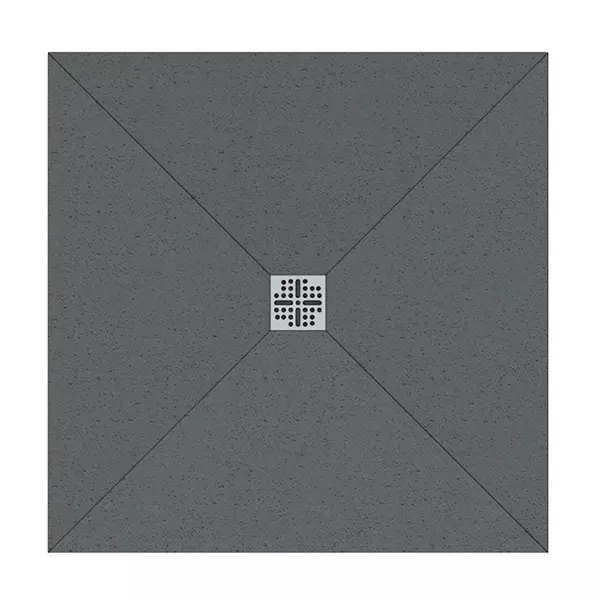
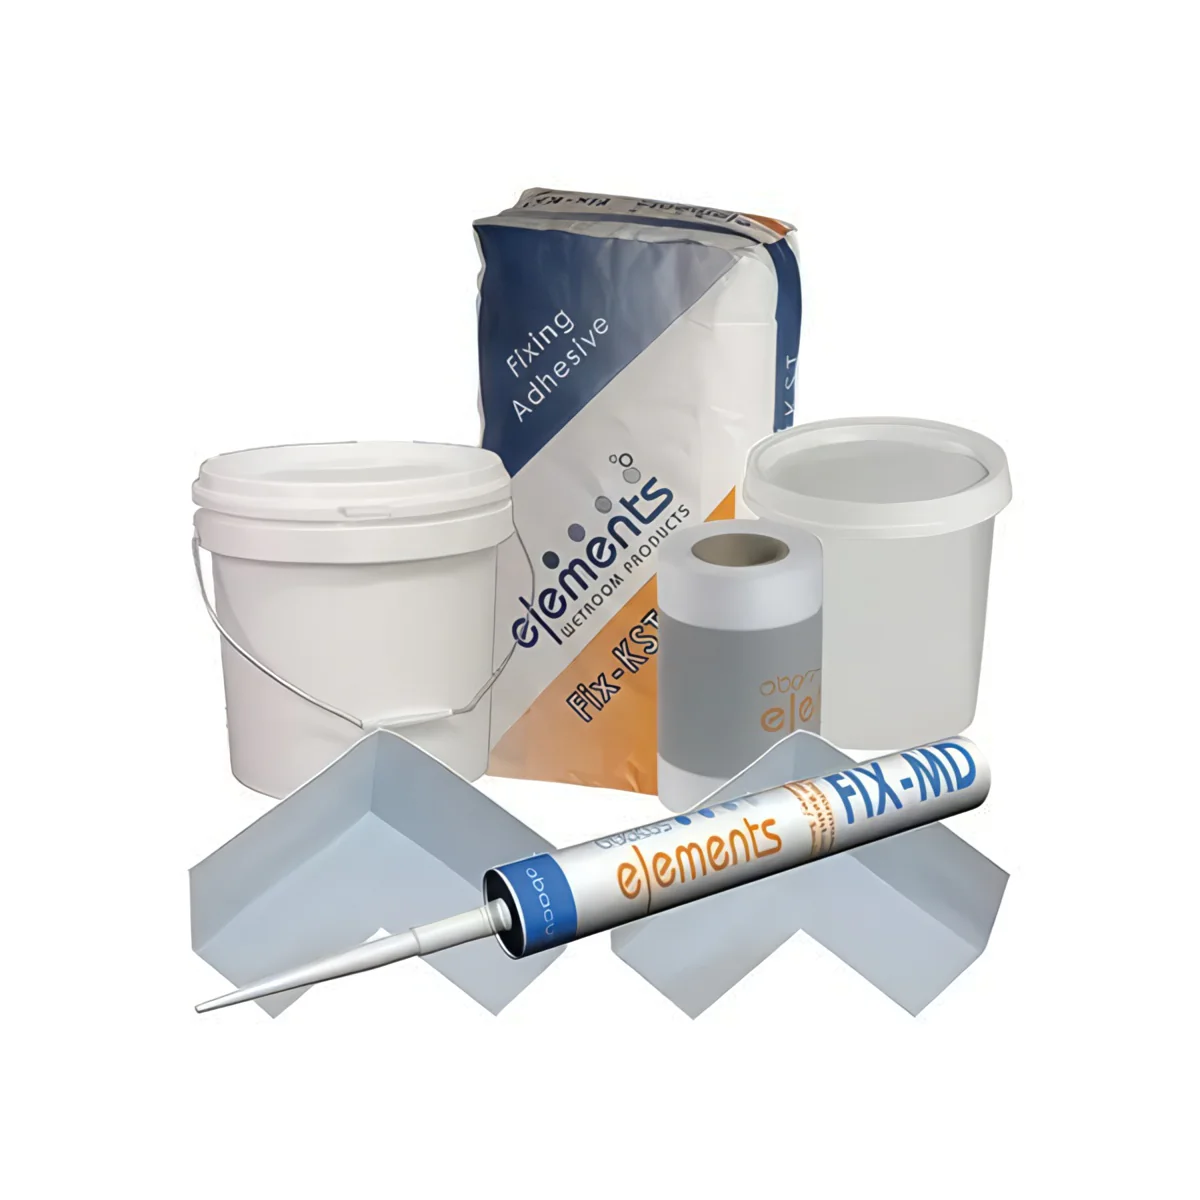
The Taurus Wet Room Tray Former Installation Kit contains everything needed to correctly bed, bond, and waterproof a wet room shower tray former to the subfloor. It is designed to work in conjunction with Taurus XPS wet room tray formers and provides the full range of consumables required for a compliant, fully waterproof installation: bedding adhesive, waterproof tape sealing compound, waterproof perimeter tape, pre-formed internal corners, wood floor primer, a paintbrush, and protective gloves. Buying the installation kit alongside the tray former ensures the installer has the correct materials to hand from the outset — eliminating the risk of incorrect product substitution and reducing return visits to the merchant.
What's in the Kit
- Fix-KST Fixing Adhesive — 5kg Low-shrink, flexible, fast-set cementitious adhesive for bedding the tray former to the subfloor. Suitable for timber joist floors (primed) and concrete slabs. 5kg covers approximately 2m² of screeded bedding at standard depth. For large format trays (e.g. 1600×900mm or larger), additional Fix-KST will be required — purchase separately.
- Pro-Seal Premixed — 500ml Ready-to-use waterproof sealing compound applied beneath and over the waterproofing tape. Seals the tape firmly to the tray perimeter and subfloor junction, completing the waterproof barrier at the most vulnerable point of the installation.
- Waterproof Tape — 5m Flexible waterproof fabric tape for sealing the perimeter joint between the tray former and the surrounding floor or wall boards. Applied in Pro-Seal compound. Bridges the movement joint at the tray edge and prevents water tracking under the tiled surface.
- 2× Waterproof Internal Corners Pre-formed waterproof corner pieces for use at the internal 90° angles where the tray former meets the wall boards. Eliminates the need to cut and fold tape around corners — a common point of weakness — and ensures a consistent, fully sealed junction in each corner.
- Wood Floor Primer — 1L Applied to timber subfloors before bedding the tray former. Reduces porosity of the timber surface and improves adhesion of the Fix-KST bedding adhesive. Essential on timber joist floors — do not skip this step. Covers approximately 10m².
- 50mm Paintbrush For applying the wood floor primer and working Pro-Seal compound under and over the waterproof tape edges.
- Protective Gloves For use when handling Fix-KST adhesive and Pro-Seal compound.
Why Use a Dedicated Installation Kit?
A wet room tray former that is not correctly bedded or waterproofed at its perimeter is one of the most common causes of wet room failure. Water tracking under a tray former — through an inadequately sealed perimeter joint, through an incorrectly primed timber subfloor, or through a poorly adhered bedding layer — can cause extensive structural damage that is expensive and disruptive to remedy. The Taurus installation kit provides all the correct, system-matched consumables in the right quantities for a single tray installation, ensuring the installer does not substitute incompatible materials or omit critical steps.
Using system-matched products throughout — Fix-KST for bedding, Pro-Seal for tape sealing, and pre-formed internal corners — also provides a consistent set of material properties across the installation. All components are formulated to work together, with compatible cure times, flexibility ratings, and adhesion characteristics.
Key Benefits
Installation Overview
The following sequence covers the key steps for installing a Taurus wet room tray former using this kit. Always refer to the full installation instructions supplied with the tray former and this kit before starting work.
- Prepare the subfloor. Ensure the subfloor is clean, level, and structurally sound. Check for any deflection in timber floors and address with additional strutting or noggins if required. Remove any dust, grease, or debris.
- Prime timber floors. On timber joist subfloors, apply the included Wood Floor Primer using the 50mm paintbrush. Allow to dry fully before proceeding. Do not prime concrete floors — this step applies to timber only.
- Mix and apply Fix-KST bedding adhesive. Mix the Fix-KST to a firm bedding consistency in the supplied tub. Apply to the subfloor in the tray footprint, combing with a notched trowel to create a full, even bed. Also apply to the underside of the tray former if required by the tray installation instructions.
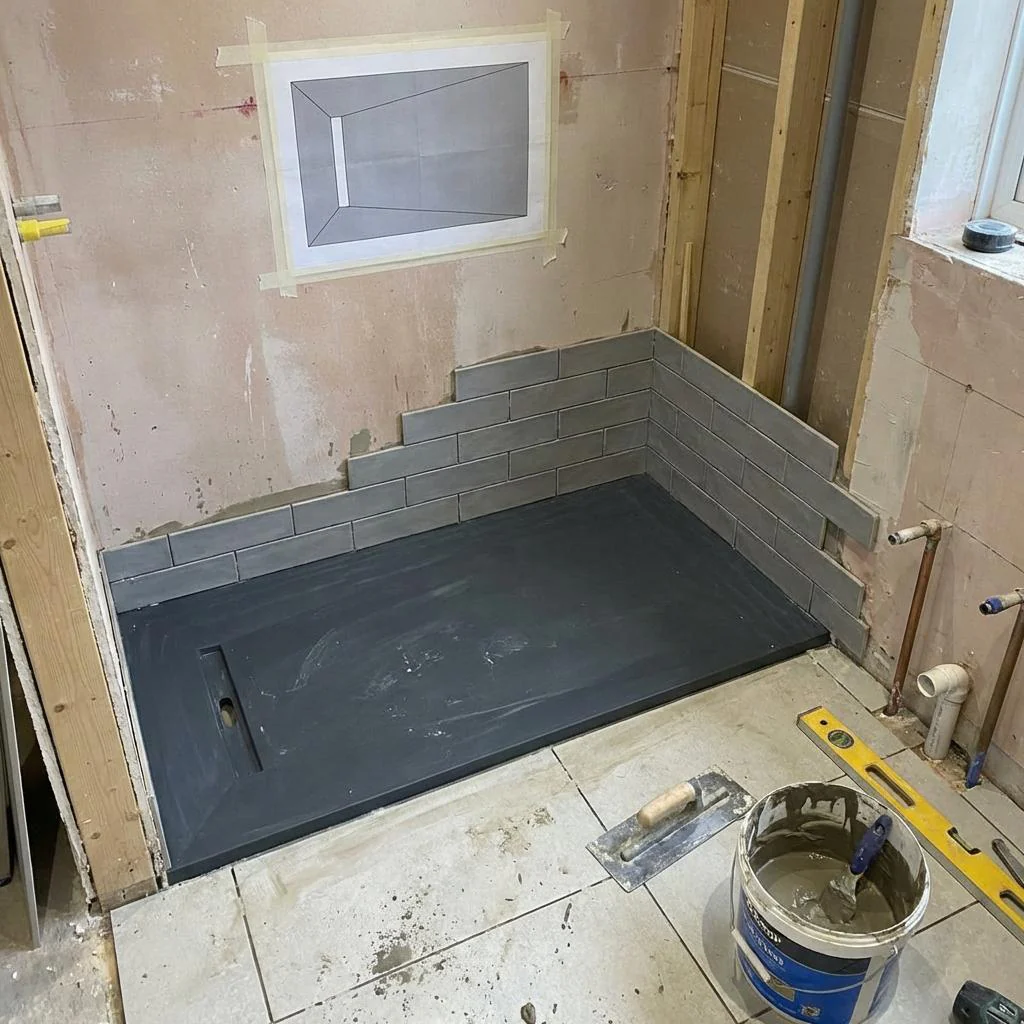
- Bed the tray former. Lower the tray former into position and press firmly into the Fix-KST bed. Check level and alignment. Adjust before the adhesive starts to set. Allow to cure fully before applying tape and tiles — do not rush this stage.
- Apply Pro-Seal to the tray perimeter. Using the paintbrush, apply Pro-Seal compound along the full perimeter of the tray where it meets the surrounding floor and any wall boards. Work Pro-Seal under the tape as it is applied.
- Apply waterproof tape. Press the waterproof tape into the Pro-Seal compound along all straight perimeter runs, overlapping onto both the tray surface and the surrounding floor/wall substrate. At each internal corner, bed the included pre-formed corner pieces first, then overlap the straight tape runs onto them.
- Apply Pro-Seal over tape. Brush a coat of Pro-Seal over the full surface of the applied tape, ensuring all edges are fully sealed. Allow to cure before tiling.
- Tile. Once fully cured, tile the tray and surrounding floor with a C2-rated flexible tile adhesive. Maintain a movement joint at the tray perimeter — do not grout this joint; fill with a sanitary-grade silicone sealant.
⚠️ Large Tray Formers — Additional Fix-KST Required
This kit contains 5kg of Fix-KST fixing adhesive, which is sufficient for approximately 2m² of screeded bedding at standard depth. For tray formers larger than approximately 1200×900mm — for example 1600×900mm or 1200×1200mm — the 5kg quantity will not be sufficient to fully bed the tray. Additional Fix-KST should be purchased separately before installation begins. It is always better to have surplus adhesive on site than to run short mid-installation.
🪵 Timber Floors — Do Not Skip the Primer
The wood floor primer is included for a reason. Unprimed timber surfaces are highly porous and will draw moisture out of the Fix-KST bedding adhesive before it can develop full adhesion — resulting in a weak, dusty bond that fails over time. Apply the primer to the full tray footprint (and a generous margin around it), allow it to dry completely, and only then apply the Fix-KST bed. This single step is the most commonly skipped and the most commonly cited cause of tray bedding failure on timber floors.
Technical Specifications
| Specification | Detail |
|---|---|
| Product Name | Taurus Wet Room Tray Former Installation Kit |
| MPN | AP022505 |
| Application | Installation and waterproofing of XPS wet room tray formers |
| Suitable Substrates | Timber joist floors (with primer), concrete slabs |
| Fix-KST Adhesive | 5kg — covers approximately 2m² of screeded bedding |
| Pro-Seal Compound | 500ml premixed — waterproof tape sealing compound |
| Waterproof Tape | 5m length |
| Internal Corners | 2× pre-formed waterproof corner pieces |
| Wood Floor Primer | 1L — covers approximately 10m² |
| Tools Included | 50mm paintbrush, protective gloves |
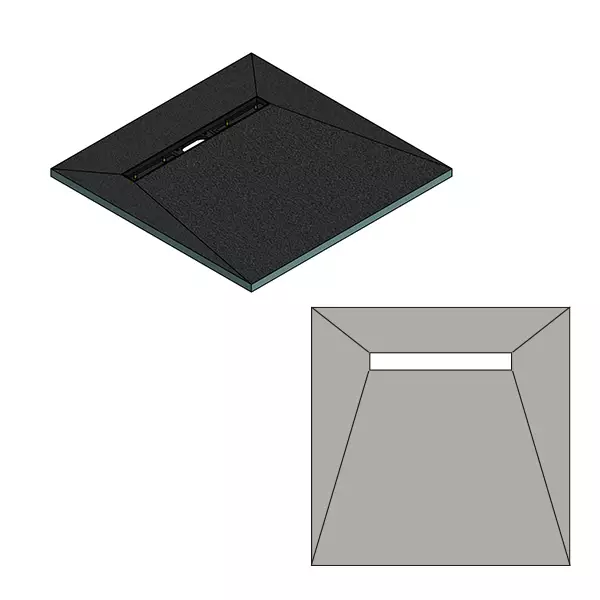
| Compatible With | Taurus XPS wet room tray formers (square and linear waste) |
| Brand | Taurus |
Frequently Asked Questions
Is this kit included when I buy a Taurus tray former?
No — the installation kit is sold separately from the tray former. The tray former covers the structural element; this kit provides all the consumables needed to correctly bed and waterproof it. Both should be ordered together to ensure everything is on site when installation begins.
Do I need one kit per tray former?
Yes — one kit is designed for the installation of one tray former of up to approximately 2m² (e.g. up to 1200×900mm). For larger tray formers, the Fix-KST quantity in this kit will not be sufficient and additional Fix-KST must be purchased separately. The tape, Pro-Seal, and corners are sufficient for one standard installation regardless of tray size.
Can I use this kit on a concrete floor without the primer?
Yes — the wood floor primer is only required on timber subfloors. On concrete floors, the Fix-KST can be applied directly to a clean, sound concrete slab without priming. Ensure the concrete is free from dust, grease, and any loose material before applying the bedding adhesive.
What if my tray former is larger than 1200×900mm?
The 5kg Fix-KST included in this kit covers approximately 2m² of screeded bedding. A 1600×900mm tray former has a footprint of 1.44m², but bedding depth and any sub-element fill means you will likely exceed the 5kg allowance. Purchase additional Fix-KST separately before starting work. The rest of the kit contents (tape, Pro-Seal, corners) are sufficient regardless of tray size.
Is a movement joint needed at the tray perimeter once tiled?
Yes. The junction between the tray former and the surrounding tiled floor is a movement joint — the tray and the surrounding substrate will expand and contract at different rates. This joint must never be grouted. Once fully cured and tiled, fill the perimeter joint with a sanitary-grade silicone sealant in a colour matched to the tile grout. Grouting over this joint will result in cracking and eventual water ingress.
Can this kit be used with non-Taurus tray formers?
The consumables in this kit — Fix-KST, Pro-Seal, waterproof tape, and internal corners — are generic wet room installation materials that will work with most XPS and GRP tray formers from other manufacturers. However, always check the tray former manufacturer's installation instructions to confirm the specified bedding adhesive type and any other requirements specific to their product.
Original: $209.20
-65%$209.20
$73.22More Images

Taurus Wet Room Tray Former Installation Kit | Fix-KST Adhesive, Pro-Seal, Waterproof Tape & Internal Corners
Tray Former Installation Fix-KST 5kg Adhesive Pro-Seal 500ml 5m Waterproof Tape Complete — All Consumables Included
The Taurus Wet Room Tray Former Installation Kit contains everything needed to correctly bed, bond, and waterproof a wet room shower tray former to the subfloor. It is designed to work in conjunction with Taurus XPS wet room tray formers and provides the full range of consumables required for a compliant, fully waterproof installation: bedding adhesive, waterproof tape sealing compound, waterproof perimeter tape, pre-formed internal corners, wood floor primer, a paintbrush, and protective gloves. Buying the installation kit alongside the tray former ensures the installer has the correct materials to hand from the outset — eliminating the risk of incorrect product substitution and reducing return visits to the merchant.
What's in the Kit
- Fix-KST Fixing Adhesive — 5kg Low-shrink, flexible, fast-set cementitious adhesive for bedding the tray former to the subfloor. Suitable for timber joist floors (primed) and concrete slabs. 5kg covers approximately 2m² of screeded bedding at standard depth. For large format trays (e.g. 1600×900mm or larger), additional Fix-KST will be required — purchase separately.
- Pro-Seal Premixed — 500ml Ready-to-use waterproof sealing compound applied beneath and over the waterproofing tape. Seals the tape firmly to the tray perimeter and subfloor junction, completing the waterproof barrier at the most vulnerable point of the installation.
- Waterproof Tape — 5m Flexible waterproof fabric tape for sealing the perimeter joint between the tray former and the surrounding floor or wall boards. Applied in Pro-Seal compound. Bridges the movement joint at the tray edge and prevents water tracking under the tiled surface.
- 2× Waterproof Internal Corners Pre-formed waterproof corner pieces for use at the internal 90° angles where the tray former meets the wall boards. Eliminates the need to cut and fold tape around corners — a common point of weakness — and ensures a consistent, fully sealed junction in each corner.
- Wood Floor Primer — 1L Applied to timber subfloors before bedding the tray former. Reduces porosity of the timber surface and improves adhesion of the Fix-KST bedding adhesive. Essential on timber joist floors — do not skip this step. Covers approximately 10m².
- 50mm Paintbrush For applying the wood floor primer and working Pro-Seal compound under and over the waterproof tape edges.
- Protective Gloves For use when handling Fix-KST adhesive and Pro-Seal compound.
Why Use a Dedicated Installation Kit?
A wet room tray former that is not correctly bedded or waterproofed at its perimeter is one of the most common causes of wet room failure. Water tracking under a tray former — through an inadequately sealed perimeter joint, through an incorrectly primed timber subfloor, or through a poorly adhered bedding layer — can cause extensive structural damage that is expensive and disruptive to remedy. The Taurus installation kit provides all the correct, system-matched consumables in the right quantities for a single tray installation, ensuring the installer does not substitute incompatible materials or omit critical steps.
Using system-matched products throughout — Fix-KST for bedding, Pro-Seal for tape sealing, and pre-formed internal corners — also provides a consistent set of material properties across the installation. All components are formulated to work together, with compatible cure times, flexibility ratings, and adhesion characteristics.
Key Benefits
Installation Overview
The following sequence covers the key steps for installing a Taurus wet room tray former using this kit. Always refer to the full installation instructions supplied with the tray former and this kit before starting work.
- Prepare the subfloor. Ensure the subfloor is clean, level, and structurally sound. Check for any deflection in timber floors and address with additional strutting or noggins if required. Remove any dust, grease, or debris.
- Prime timber floors. On timber joist subfloors, apply the included Wood Floor Primer using the 50mm paintbrush. Allow to dry fully before proceeding. Do not prime concrete floors — this step applies to timber only.
- Mix and apply Fix-KST bedding adhesive. Mix the Fix-KST to a firm bedding consistency in the supplied tub. Apply to the subfloor in the tray footprint, combing with a notched trowel to create a full, even bed. Also apply to the underside of the tray former if required by the tray installation instructions.
- Bed the tray former. Lower the tray former into position and press firmly into the Fix-KST bed. Check level and alignment. Adjust before the adhesive starts to set. Allow to cure fully before applying tape and tiles — do not rush this stage.
- Apply Pro-Seal to the tray perimeter. Using the paintbrush, apply Pro-Seal compound along the full perimeter of the tray where it meets the surrounding floor and any wall boards. Work Pro-Seal under the tape as it is applied.
- Apply waterproof tape. Press the waterproof tape into the Pro-Seal compound along all straight perimeter runs, overlapping onto both the tray surface and the surrounding floor/wall substrate. At each internal corner, bed the included pre-formed corner pieces first, then overlap the straight tape runs onto them.
- Apply Pro-Seal over tape. Brush a coat of Pro-Seal over the full surface of the applied tape, ensuring all edges are fully sealed. Allow to cure before tiling.
- Tile. Once fully cured, tile the tray and surrounding floor with a C2-rated flexible tile adhesive. Maintain a movement joint at the tray perimeter — do not grout this joint; fill with a sanitary-grade silicone sealant.
⚠️ Large Tray Formers — Additional Fix-KST Required
This kit contains 5kg of Fix-KST fixing adhesive, which is sufficient for approximately 2m² of screeded bedding at standard depth. For tray formers larger than approximately 1200×900mm — for example 1600×900mm or 1200×1200mm — the 5kg quantity will not be sufficient to fully bed the tray. Additional Fix-KST should be purchased separately before installation begins. It is always better to have surplus adhesive on site than to run short mid-installation.
🪵 Timber Floors — Do Not Skip the Primer
The wood floor primer is included for a reason. Unprimed timber surfaces are highly porous and will draw moisture out of the Fix-KST bedding adhesive before it can develop full adhesion — resulting in a weak, dusty bond that fails over time. Apply the primer to the full tray footprint (and a generous margin around it), allow it to dry completely, and only then apply the Fix-KST bed. This single step is the most commonly skipped and the most commonly cited cause of tray bedding failure on timber floors.
Technical Specifications
| Specification | Detail |
|---|---|
| Product Name | Taurus Wet Room Tray Former Installation Kit |
| MPN | AP022505 |
| Application | Installation and waterproofing of XPS wet room tray formers |
| Suitable Substrates | Timber joist floors (with primer), concrete slabs |
| Fix-KST Adhesive | 5kg — covers approximately 2m² of screeded bedding |
| Pro-Seal Compound | 500ml premixed — waterproof tape sealing compound |
| Waterproof Tape | 5m length |
| Internal Corners | 2× pre-formed waterproof corner pieces |
| Wood Floor Primer | 1L — covers approximately 10m² |
| Tools Included | 50mm paintbrush, protective gloves |
| Compatible With | Taurus XPS wet room tray formers (square and linear waste) |
| Brand | Taurus |
Frequently Asked Questions
Is this kit included when I buy a Taurus tray former?
No — the installation kit is sold separately from the tray former. The tray former covers the structural element; this kit provides all the consumables needed to correctly bed and waterproof it. Both should be ordered together to ensure everything is on site when installation begins.
Do I need one kit per tray former?
Yes — one kit is designed for the installation of one tray former of up to approximately 2m² (e.g. up to 1200×900mm). For larger tray formers, the Fix-KST quantity in this kit will not be sufficient and additional Fix-KST must be purchased separately. The tape, Pro-Seal, and corners are sufficient for one standard installation regardless of tray size.
Can I use this kit on a concrete floor without the primer?
Yes — the wood floor primer is only required on timber subfloors. On concrete floors, the Fix-KST can be applied directly to a clean, sound concrete slab without priming. Ensure the concrete is free from dust, grease, and any loose material before applying the bedding adhesive.
What if my tray former is larger than 1200×900mm?
The 5kg Fix-KST included in this kit covers approximately 2m² of screeded bedding. A 1600×900mm tray former has a footprint of 1.44m², but bedding depth and any sub-element fill means you will likely exceed the 5kg allowance. Purchase additional Fix-KST separately before starting work. The rest of the kit contents (tape, Pro-Seal, corners) are sufficient regardless of tray size.
Is a movement joint needed at the tray perimeter once tiled?
Yes. The junction between the tray former and the surrounding tiled floor is a movement joint — the tray and the surrounding substrate will expand and contract at different rates. This joint must never be grouted. Once fully cured and tiled, fill the perimeter joint with a sanitary-grade silicone sealant in a colour matched to the tile grout. Grouting over this joint will result in cracking and eventual water ingress.
Can this kit be used with non-Taurus tray formers?
The consumables in this kit — Fix-KST, Pro-Seal, waterproof tape, and internal corners — are generic wet room installation materials that will work with most XPS and GRP tray formers from other manufacturers. However, always check the tray former manufacturer's installation instructions to confirm the specified bedding adhesive type and any other requirements specific to their product.
Product Information
Product Information
Shipping & Returns
Shipping & Returns
Description
Tray Former Installation Fix-KST 5kg Adhesive Pro-Seal 500ml 5m Waterproof Tape Complete — All Consumables Included
The Taurus Wet Room Tray Former Installation Kit contains everything needed to correctly bed, bond, and waterproof a wet room shower tray former to the subfloor. It is designed to work in conjunction with Taurus XPS wet room tray formers and provides the full range of consumables required for a compliant, fully waterproof installation: bedding adhesive, waterproof tape sealing compound, waterproof perimeter tape, pre-formed internal corners, wood floor primer, a paintbrush, and protective gloves. Buying the installation kit alongside the tray former ensures the installer has the correct materials to hand from the outset — eliminating the risk of incorrect product substitution and reducing return visits to the merchant.
What's in the Kit
- Fix-KST Fixing Adhesive — 5kg Low-shrink, flexible, fast-set cementitious adhesive for bedding the tray former to the subfloor. Suitable for timber joist floors (primed) and concrete slabs. 5kg covers approximately 2m² of screeded bedding at standard depth. For large format trays (e.g. 1600×900mm or larger), additional Fix-KST will be required — purchase separately.
- Pro-Seal Premixed — 500ml Ready-to-use waterproof sealing compound applied beneath and over the waterproofing tape. Seals the tape firmly to the tray perimeter and subfloor junction, completing the waterproof barrier at the most vulnerable point of the installation.
- Waterproof Tape — 5m Flexible waterproof fabric tape for sealing the perimeter joint between the tray former and the surrounding floor or wall boards. Applied in Pro-Seal compound. Bridges the movement joint at the tray edge and prevents water tracking under the tiled surface.
- 2× Waterproof Internal Corners Pre-formed waterproof corner pieces for use at the internal 90° angles where the tray former meets the wall boards. Eliminates the need to cut and fold tape around corners — a common point of weakness — and ensures a consistent, fully sealed junction in each corner.
- Wood Floor Primer — 1L Applied to timber subfloors before bedding the tray former. Reduces porosity of the timber surface and improves adhesion of the Fix-KST bedding adhesive. Essential on timber joist floors — do not skip this step. Covers approximately 10m².
- 50mm Paintbrush For applying the wood floor primer and working Pro-Seal compound under and over the waterproof tape edges.
- Protective Gloves For use when handling Fix-KST adhesive and Pro-Seal compound.
Why Use a Dedicated Installation Kit?
A wet room tray former that is not correctly bedded or waterproofed at its perimeter is one of the most common causes of wet room failure. Water tracking under a tray former — through an inadequately sealed perimeter joint, through an incorrectly primed timber subfloor, or through a poorly adhered bedding layer — can cause extensive structural damage that is expensive and disruptive to remedy. The Taurus installation kit provides all the correct, system-matched consumables in the right quantities for a single tray installation, ensuring the installer does not substitute incompatible materials or omit critical steps.
Using system-matched products throughout — Fix-KST for bedding, Pro-Seal for tape sealing, and pre-formed internal corners — also provides a consistent set of material properties across the installation. All components are formulated to work together, with compatible cure times, flexibility ratings, and adhesion characteristics.
Key Benefits
Installation Overview
The following sequence covers the key steps for installing a Taurus wet room tray former using this kit. Always refer to the full installation instructions supplied with the tray former and this kit before starting work.
- Prepare the subfloor. Ensure the subfloor is clean, level, and structurally sound. Check for any deflection in timber floors and address with additional strutting or noggins if required. Remove any dust, grease, or debris.
- Prime timber floors. On timber joist subfloors, apply the included Wood Floor Primer using the 50mm paintbrush. Allow to dry fully before proceeding. Do not prime concrete floors — this step applies to timber only.
- Mix and apply Fix-KST bedding adhesive. Mix the Fix-KST to a firm bedding consistency in the supplied tub. Apply to the subfloor in the tray footprint, combing with a notched trowel to create a full, even bed. Also apply to the underside of the tray former if required by the tray installation instructions.
- Bed the tray former. Lower the tray former into position and press firmly into the Fix-KST bed. Check level and alignment. Adjust before the adhesive starts to set. Allow to cure fully before applying tape and tiles — do not rush this stage.
- Apply Pro-Seal to the tray perimeter. Using the paintbrush, apply Pro-Seal compound along the full perimeter of the tray where it meets the surrounding floor and any wall boards. Work Pro-Seal under the tape as it is applied.
- Apply waterproof tape. Press the waterproof tape into the Pro-Seal compound along all straight perimeter runs, overlapping onto both the tray surface and the surrounding floor/wall substrate. At each internal corner, bed the included pre-formed corner pieces first, then overlap the straight tape runs onto them.
- Apply Pro-Seal over tape. Brush a coat of Pro-Seal over the full surface of the applied tape, ensuring all edges are fully sealed. Allow to cure before tiling.
- Tile. Once fully cured, tile the tray and surrounding floor with a C2-rated flexible tile adhesive. Maintain a movement joint at the tray perimeter — do not grout this joint; fill with a sanitary-grade silicone sealant.
⚠️ Large Tray Formers — Additional Fix-KST Required
This kit contains 5kg of Fix-KST fixing adhesive, which is sufficient for approximately 2m² of screeded bedding at standard depth. For tray formers larger than approximately 1200×900mm — for example 1600×900mm or 1200×1200mm — the 5kg quantity will not be sufficient to fully bed the tray. Additional Fix-KST should be purchased separately before installation begins. It is always better to have surplus adhesive on site than to run short mid-installation.
🪵 Timber Floors — Do Not Skip the Primer
The wood floor primer is included for a reason. Unprimed timber surfaces are highly porous and will draw moisture out of the Fix-KST bedding adhesive before it can develop full adhesion — resulting in a weak, dusty bond that fails over time. Apply the primer to the full tray footprint (and a generous margin around it), allow it to dry completely, and only then apply the Fix-KST bed. This single step is the most commonly skipped and the most commonly cited cause of tray bedding failure on timber floors.
Technical Specifications
| Specification | Detail |
|---|---|
| Product Name | Taurus Wet Room Tray Former Installation Kit |
| MPN | AP022505 |
| Application | Installation and waterproofing of XPS wet room tray formers |
| Suitable Substrates | Timber joist floors (with primer), concrete slabs |
| Fix-KST Adhesive | 5kg — covers approximately 2m² of screeded bedding |
| Pro-Seal Compound | 500ml premixed — waterproof tape sealing compound |
| Waterproof Tape | 5m length |
| Internal Corners | 2× pre-formed waterproof corner pieces |
| Wood Floor Primer | 1L — covers approximately 10m² |
| Tools Included | 50mm paintbrush, protective gloves |
| Compatible With | Taurus XPS wet room tray formers (square and linear waste) |
| Brand | Taurus |
Frequently Asked Questions
Is this kit included when I buy a Taurus tray former?
No — the installation kit is sold separately from the tray former. The tray former covers the structural element; this kit provides all the consumables needed to correctly bed and waterproof it. Both should be ordered together to ensure everything is on site when installation begins.
Do I need one kit per tray former?
Yes — one kit is designed for the installation of one tray former of up to approximately 2m² (e.g. up to 1200×900mm). For larger tray formers, the Fix-KST quantity in this kit will not be sufficient and additional Fix-KST must be purchased separately. The tape, Pro-Seal, and corners are sufficient for one standard installation regardless of tray size.
Can I use this kit on a concrete floor without the primer?
Yes — the wood floor primer is only required on timber subfloors. On concrete floors, the Fix-KST can be applied directly to a clean, sound concrete slab without priming. Ensure the concrete is free from dust, grease, and any loose material before applying the bedding adhesive.
What if my tray former is larger than 1200×900mm?
The 5kg Fix-KST included in this kit covers approximately 2m² of screeded bedding. A 1600×900mm tray former has a footprint of 1.44m², but bedding depth and any sub-element fill means you will likely exceed the 5kg allowance. Purchase additional Fix-KST separately before starting work. The rest of the kit contents (tape, Pro-Seal, corners) are sufficient regardless of tray size.
Is a movement joint needed at the tray perimeter once tiled?
Yes. The junction between the tray former and the surrounding tiled floor is a movement joint — the tray and the surrounding substrate will expand and contract at different rates. This joint must never be grouted. Once fully cured and tiled, fill the perimeter joint with a sanitary-grade silicone sealant in a colour matched to the tile grout. Grouting over this joint will result in cracking and eventual water ingress.
Can this kit be used with non-Taurus tray formers?
The consumables in this kit — Fix-KST, Pro-Seal, waterproof tape, and internal corners — are generic wet room installation materials that will work with most XPS and GRP tray formers from other manufacturers. However, always check the tray former manufacturer's installation instructions to confirm the specified bedding adhesive type and any other requirements specific to their product.