Taurus Wet Room Linear Tray Former | 30mm Level Access | XPS Tileable | Multiple Sizes | End Drain
Taurus Wet Room Linear Tray Former | 30mm Level Access | XPS Tileable | Multiple Sizes | End Drain
30mm Level Access XPS Foam Core Tileable Surface End & Offset Drain Options Timber & Screed Tray Former Only
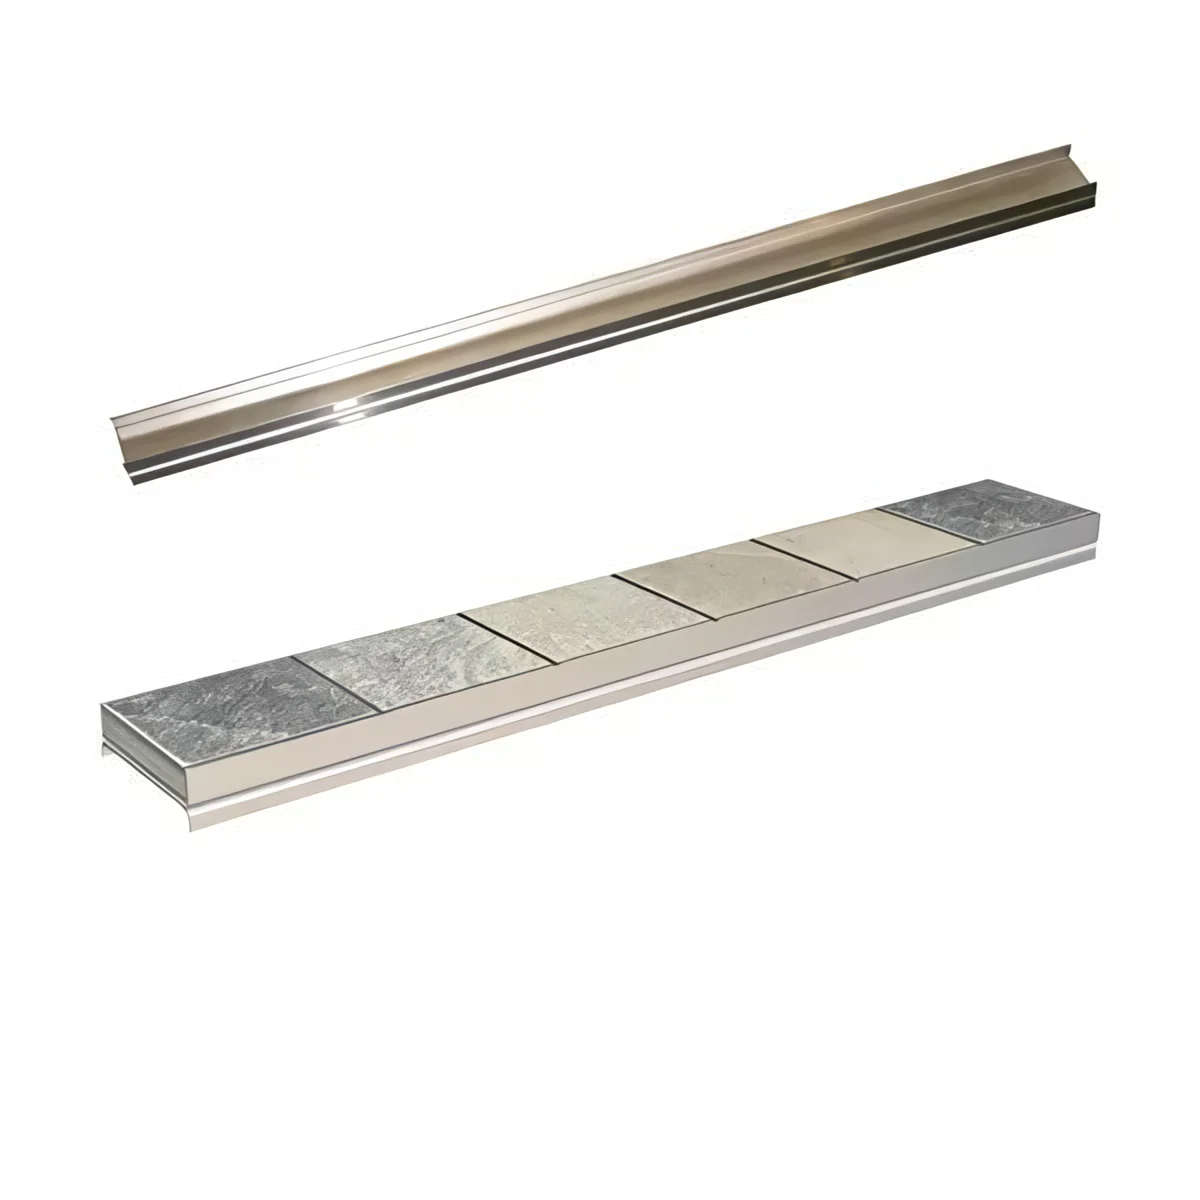
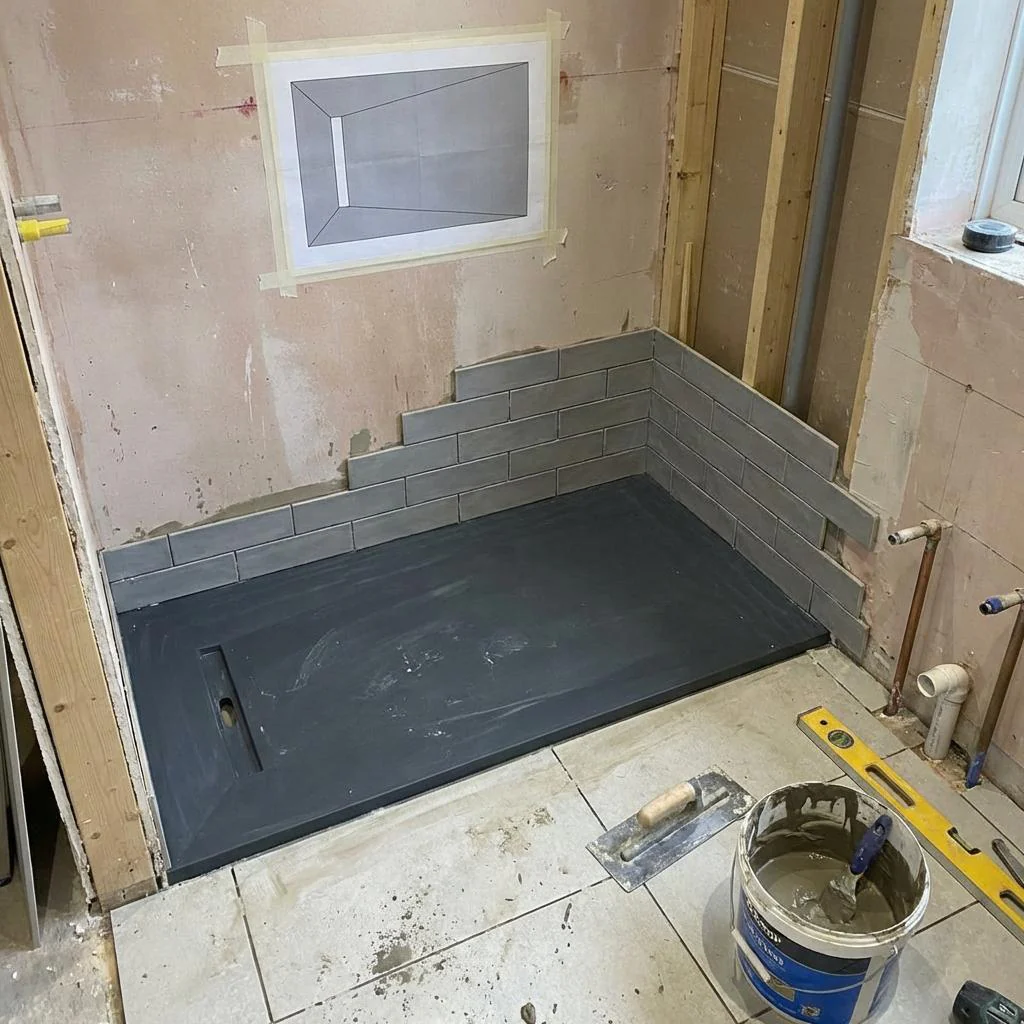
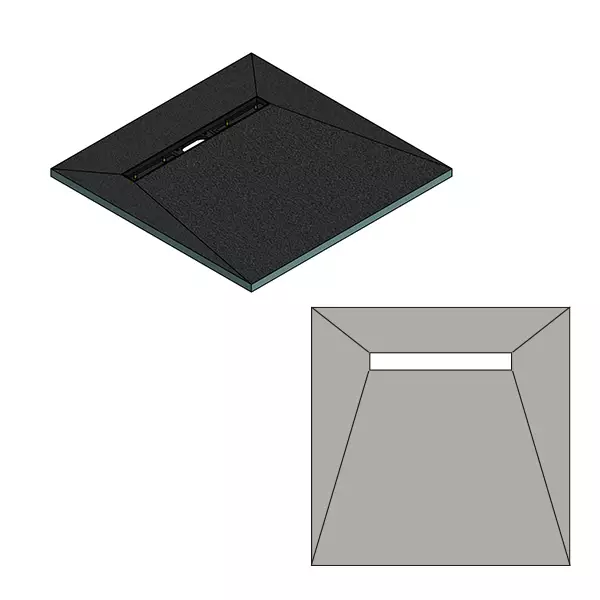
The Taurus Wet Room Linear Tray Former is a 30mm-deep level-access shower base designed for the UK overboarded-floor wet room market. Built from XPS (extruded polystyrene) foam with a cementitious, fibreglass-reinforced tile-ready surface, it is lightweight yet rigid — able to support tiles and the weight of occupants without flex or deflection. The pre-formed linear drain channel directs water to a single drain line, making tiling considerably simpler than a four-way fall to a central point drain. Available in seven size and drain configurations across two series: the LT32 series with a 300mm end drain (channel flush with one short end), and the LT34 series with a 600mm offset drain available on the 1600mm and 1800mm-long trays. Tray former only — installation kit, waste trap, and drain cover plate are sold separately.
Variant Guide — All Sizes & Drain Configurations
All variants are 30mm tray height. END drain variants have the linear channel flush with one short end of the tray. OFFSET drain variants have a 600mm channel positioned inset from one end along the long dimension — available on 1600×900 and 1800×900 only. See the "End Drain vs Offset Drain" section below before choosing.
| Tray Size (L×W) | Drain Length | Drain Position | Tray Area | MPN |
|---|---|---|---|---|
| 900 × 900mm | 300mm | END | 0.81 m² | LT320909 |
| 1200 × 900mm | 300mm | END | 1.08 m² | LT321209 |
| 1200 × 1200mm | 300mm | END | 1.44 m² | LT321212 |
| 1400 × 900mm | 300mm | END | 1.26 m² | LT321409 |
| 1600 × 900mm | 300mm | END | 1.44 m² | LT321609 |
| 1600 × 900mm | 600mm | OFFSET | 1.44 m² | LT341609 |
| 1800 × 900mm | 600mm | OFFSET | 1.62 m² | LT341809 |
End Drain vs Offset Drain — Which Do I Need?
The drain position determines where the pre-formed fall directs water, how the waste pipe must be routed beneath the floor, and how the tiled floor will look once complete. The fall is factory-moulded into the tray — it cannot be changed on site. Choose the correct variant before ordering.
🟢 End Drain — LT32 Series
The 300mm channel sits flush with one short end of the tray. The entire floor surface falls in a single direction towards that end wall. The waste pipe exits at the tray end and runs from there under the floor.
Best for: Alcove wet rooms where the drain-end wall is accessible for waste routing. All five sizes from 900×900 up to 1600×900. Simple, single-direction fall — easiest to tile evenly.
🔵 Offset Drain — LT34 Series
The 600mm channel is positioned inset from one end along the long dimension — not flush with the tray edge. Water falls from both sides of the channel towards it, halving the maximum fall distance compared to a full end drain on the same tray length.
Best for: Larger trays (1600mm, 1800mm) where a full end-to-end fall would be steep or difficult to tile. The offset position shortens each fall leg and the 600mm channel gives greater flow collection. Available on 1600×900 and 1800×900 only. Waste pipe exits along a long side edge — confirm pipe routing before ordering.
💡 Key decision — waste pipe routing
The drain position dictates where the waste pipe emerges beneath the floor. For an end drain, the pipe exits at the tray end — typically running along a wall or between joists towards a soil stack. For an offset drain, the pipe exits along one long edge of the tray. Confirm your joist direction and the intended waste run route before ordering, as this affects which variant is practical in your specific floor construction.
What Is a Linear Tray Former?
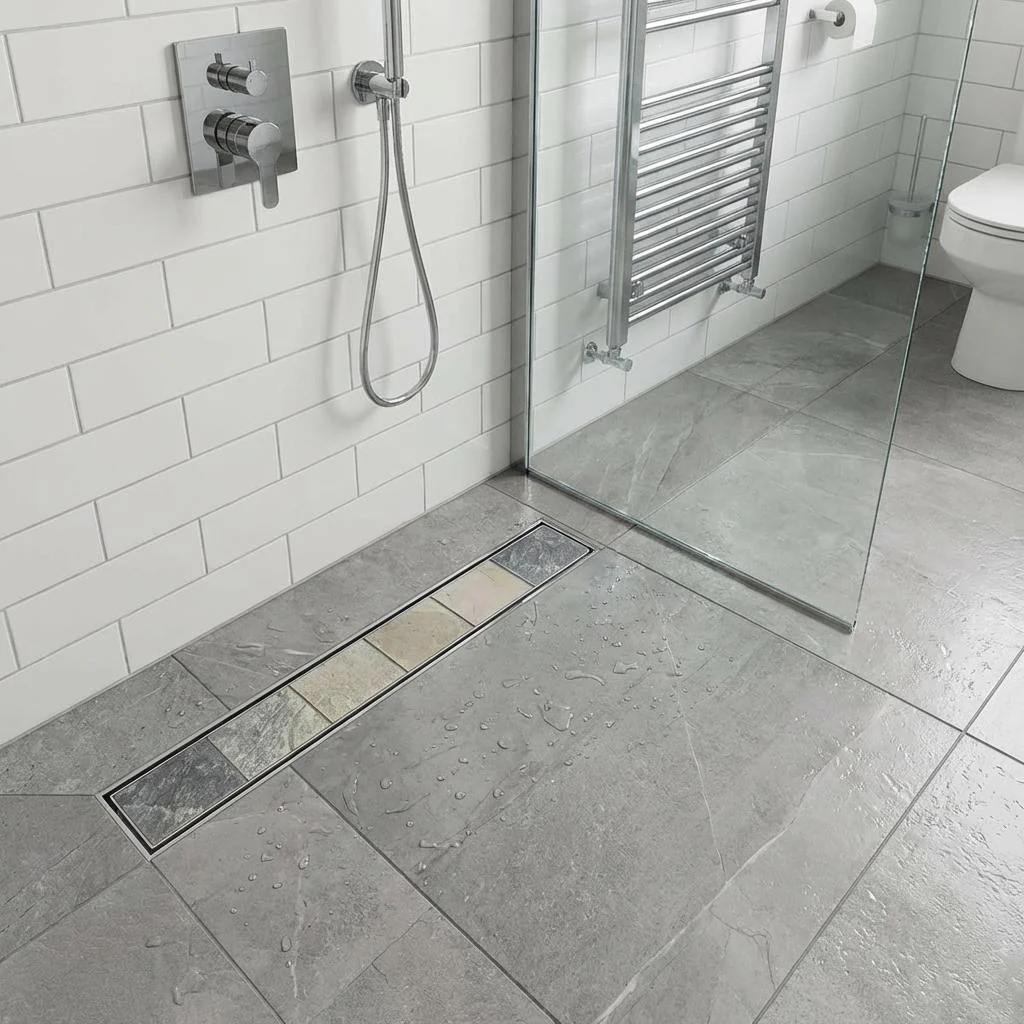
A wet room tray former is a pre-formed XPS foam base that replaces a traditional acrylic or stone resin shower tray. Rather than sitting on adjustable legs, the former is bedded directly into the floor build-up on top of the overboarded subfloor, so the finished tiled surface sits level with the surrounding bathroom floor. The drainage gradient is factory-moulded into the foam — there is no need to form a screed fall on site. Tiles are applied directly to the cementitious surface using standard flexible tile adhesive.
The linear drain design concentrates drainage into a single channel rather than a central point waste requiring a four-way fall. This is a significant practical advantage when tiling: the floor surface falls in one direction (or two symmetrical directions for the offset variant), making it far simpler to lay large-format tiles without complex cutting at every edge or uneven grout joints across the floor plane.
Key Features
What's In the Box
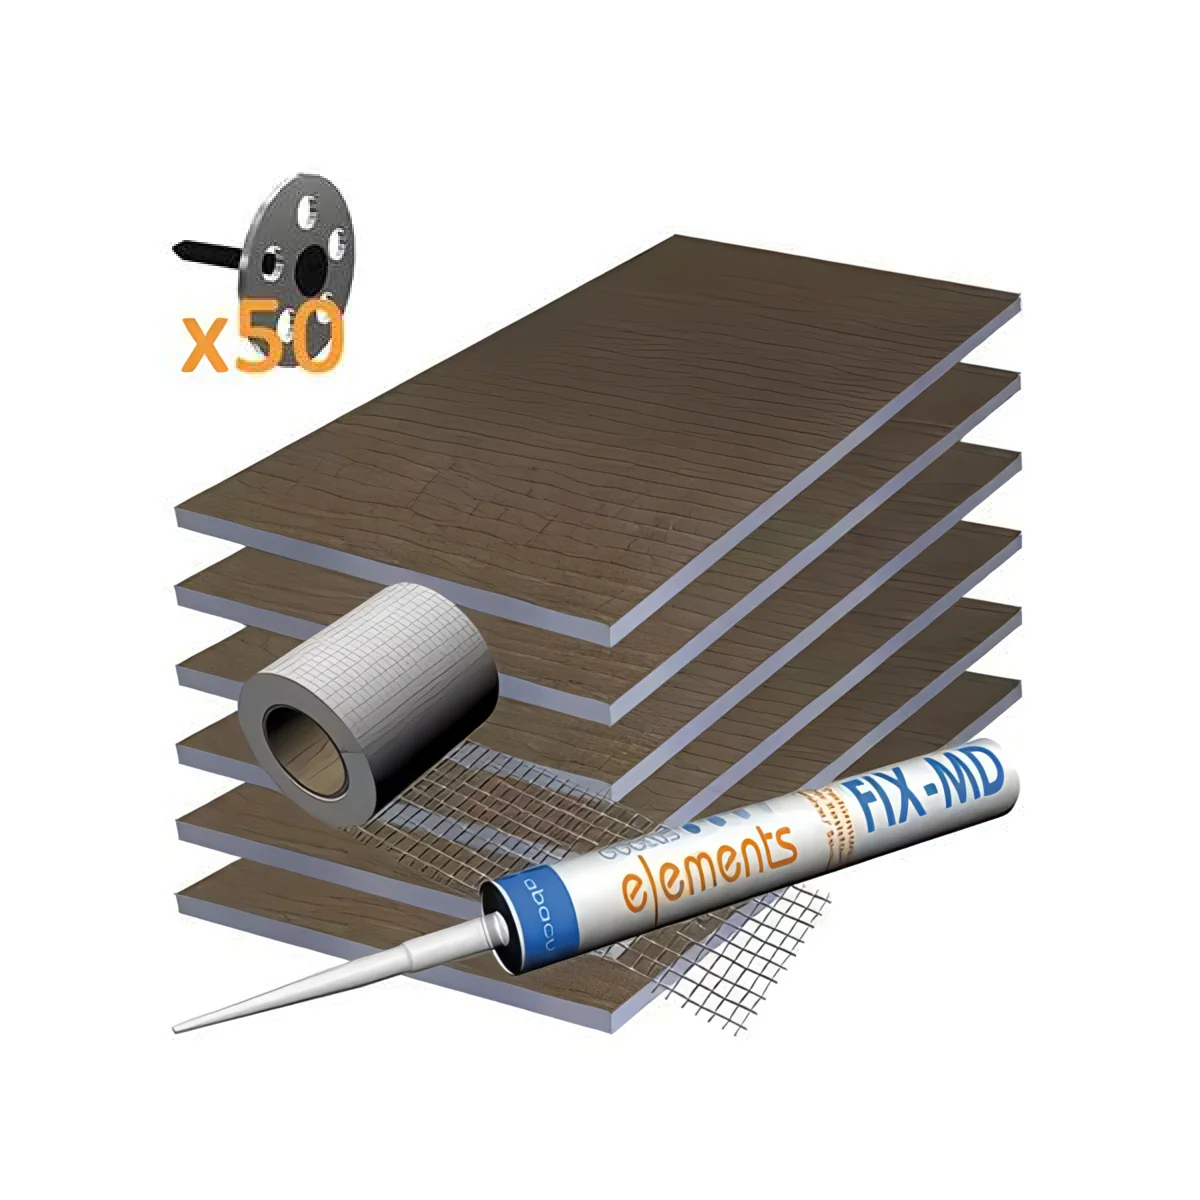
This listing is for the tray former only. The box contains:
- 1× Taurus XPS wet room linear tray former (size and drain configuration as selected)
To complete the installation you will also need — all sold separately:
- Tray Former Installation Kit — Fix-KST bedding adhesive, Pro-Seal waterproof compound, waterproof tape, internal corner pieces, wood floor primer, brush, and notched trowel
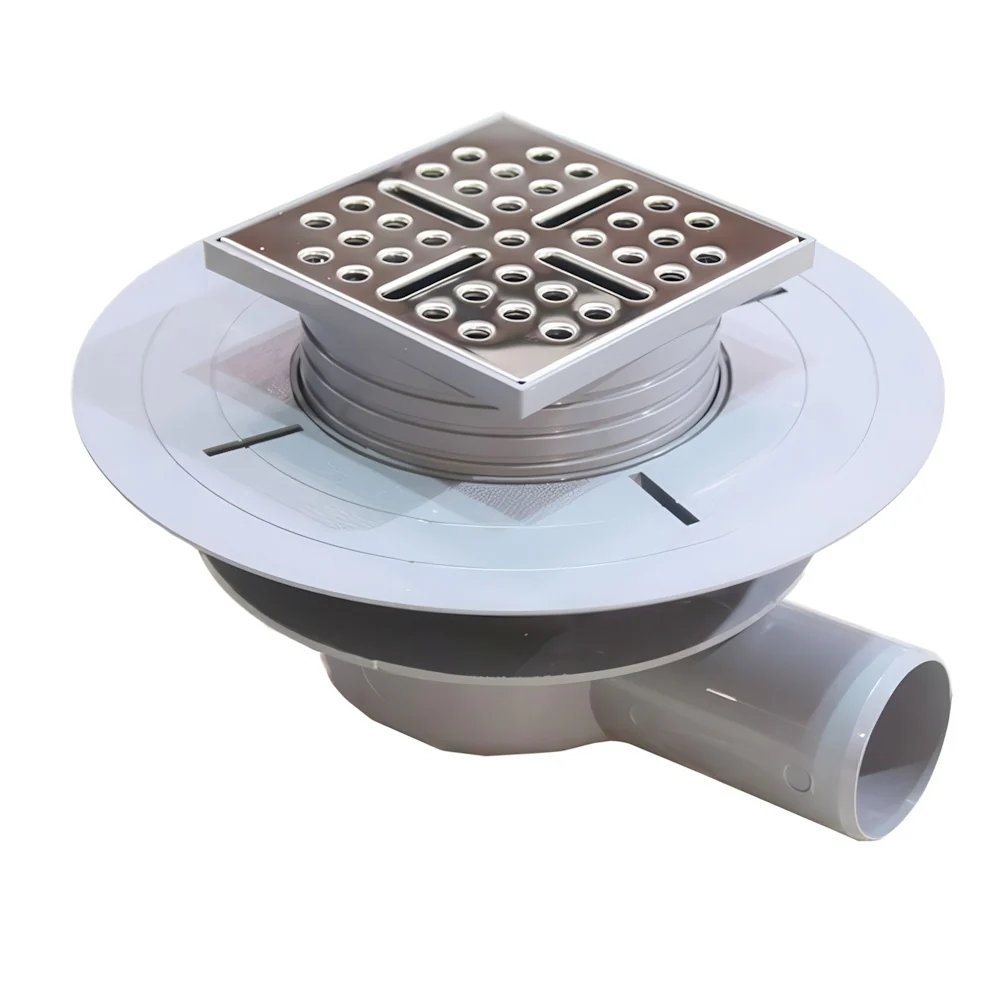
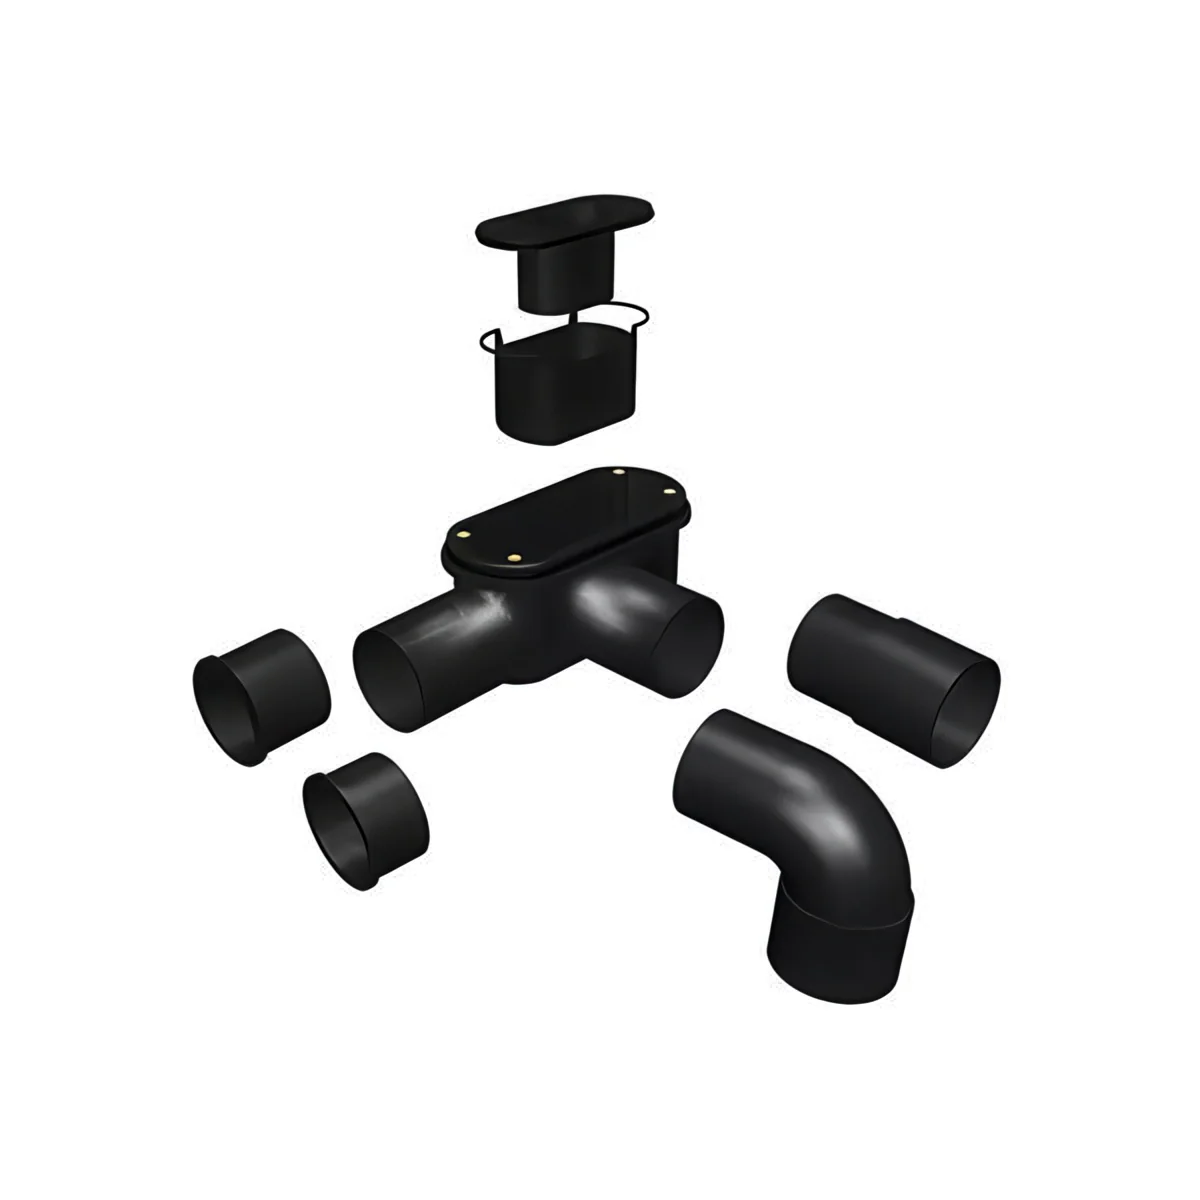
- Linear Waste Trap — match to your drain channel length (300mm trap for end drain trays; 600mm linear trap for offset drain trays)
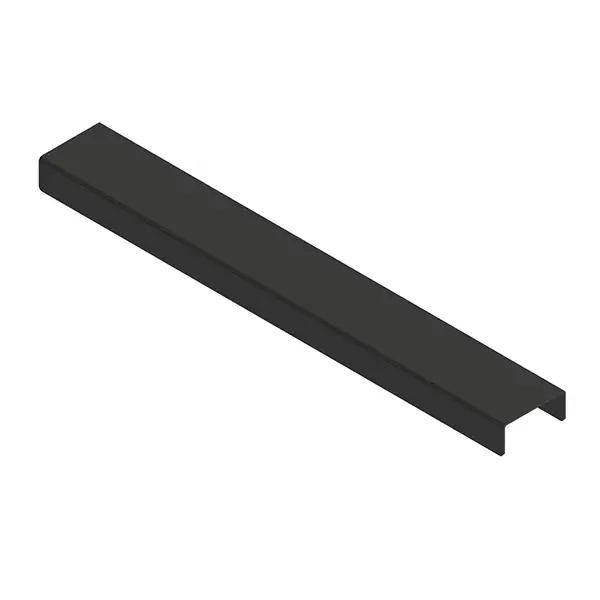
- Linear Drain Cover Plate — stainless steel, tileable, or decorative finish; match drain length and chosen finish
- Tile Backer Board (recommended) — 10mm Taurus floor backer boards to overboard the subfloor before bedding
- Tile adhesive, grout, and silicone — flexible adhesive for tiling; silicone for the perimeter movement joint
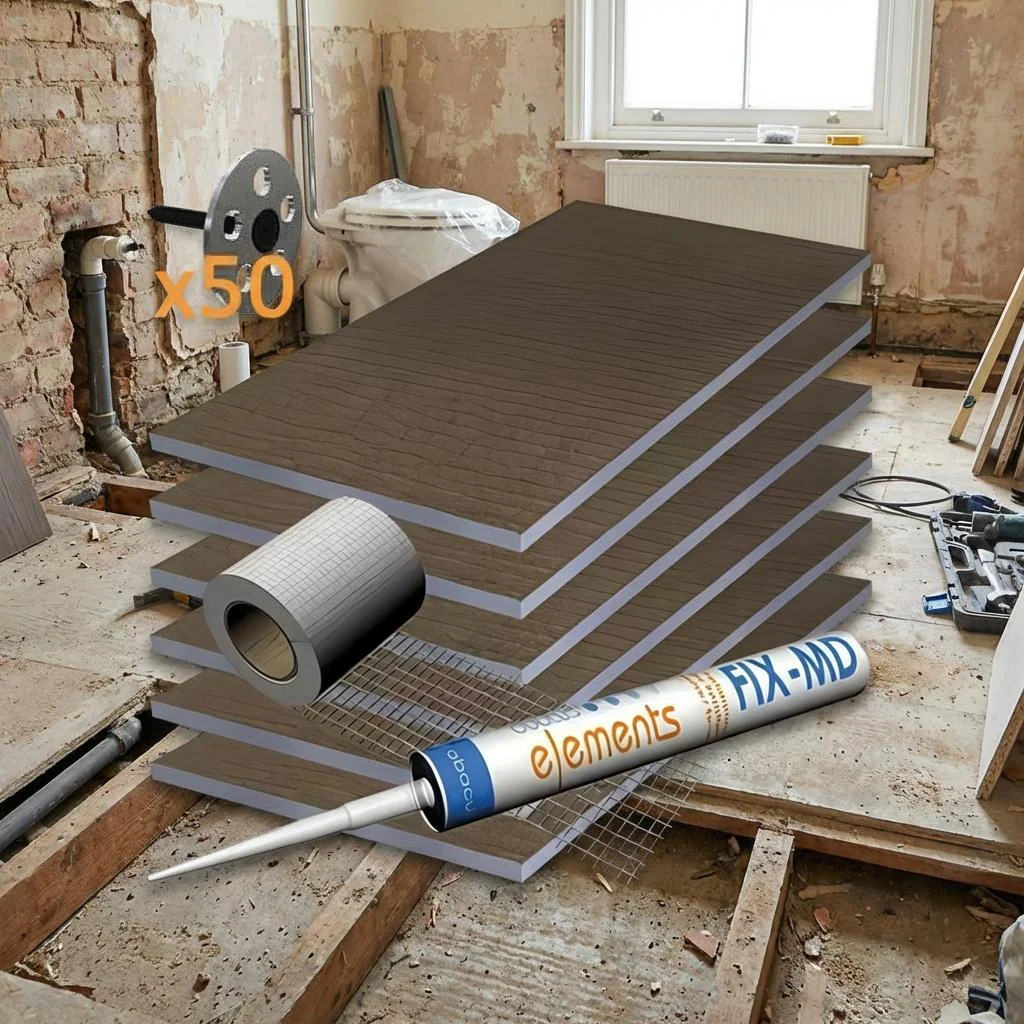
Installation Overview
- Prepare the subfloor: The floor must be flat (±3mm over 2m), sound, and clean. On timber floors, overboard with 18mm plywood or 10mm Taurus tile backer board fixed at 150mm centres. Apply wood floor primer to all timber surfaces — this step must not be omitted.
- Plan waste pipe routing: The waste pipe (40mm or 50mm to match your chosen trap) must be in position before the tray is bedded. For an end drain tray the pipe exits at the short end; for an offset drain tray the pipe exits along one long side edge. Confirm routing is practical with your floor construction and joist direction before ordering.
- Dry-fit and mark: Position the tray former in the opening to confirm fit and mark the drain channel position relative to the waste pipe. Check adequate clearance beneath the tray for the trap body.
- Set the trap height: Fit the waste trap to the drain channel and set the trap height to account for your planned tile and adhesive thickness. This is the most critical step — the height cannot be adjusted after bedding.
- Apply Fix-KST and bed the tray: Mix and apply Fix-KST to the full subfloor area using a notched trowel (full-bed only — no spot-bedding). Lower the tray onto the adhesive, press down firmly and evenly across the whole surface, and confirm the fall with a spirit level. Allow to cure fully before tiling (typically 24 hours).
- Waterproof all joints: Apply Pro-Seal compound over all joints, seams, and tray-to-wall junctions using the supplied waterproof tape. All joints must be fully sealed before any tiling begins.
- Tile the surface: Apply tiles using flexible adhesive, working from the drain channel outwards. Leave the perimeter joint between tray tiles and wall tiles clear of grout — this is a movement joint.
- Silicone perimeter: Once grouting is complete, fill the full perimeter movement joint with flexible sanitary silicone. This joint must never be grouted.
⚠️ Critical Installation Notes
Always use a full-bed of Fix-KST — spot-bedding causes the XPS to flex under load, cracking tile adhesive and grout over time. On timber floors, wood floor primer must be applied before Fix-KST — the most commonly skipped step and the most frequent cause of adhesion failure. Set trap height before bedding — it cannot be changed afterwards. The perimeter joint between tray tiles and wall tiles must always be silicone, never grout.
Technical Specifications
| Specification | Detail |
|---|---|
| Product Type | Wet room level-access tray former |
| Drain Style | Linear (channel drain) |
| Tray Height | 30mm |
| Core Material | XPS (extruded polystyrene) foam |
| Surface | Cementitious, fibreglass-reinforced, tile-ready |
| LT32 Series — Drain | 300mm end drain — channel flush with short end; single-direction fall across full tray length |
| LT34 Series — Drain | 600mm offset drain — channel inset from end along long dimension; two-directional symmetrical fall. Available 1600×900 and 1800×900 only |
| Subfloor Compatibility | Timber (overboarded) and concrete/screed |
| Can Be Cut to Size | Yes — hand saw; max 80mm reduction per edge |
| UFH Compatible | Yes (see installation notes) |
| Guarantee | 15 years |
| Installation Kit | Sold separately |
| Waste Trap | Sold separately |
| Drain Cover Plate | Sold separately |
| Brand | Taurus |
Frequently Asked Questions
What is the practical difference between the end drain and offset drain on a 1600×900mm tray?
On the end drain variant (LT321609), water falls across the full 1600mm length of the tray towards the 300mm channel at one short end. On the offset drain variant (LT341609), the 600mm channel is set inset from one end and the tray surface falls from both sides towards it — so the maximum fall distance is roughly half the tray length. The offset variant creates a gentler, more distributed gradient that can be easier to tile with large-format tiles and reduces visible slope when viewed along the floor. However, the offset drain requires the waste pipe to exit along a long side edge rather than at the end wall, which affects installation planning.
Why is the offset drain only available on the 1600×900 and 1800×900 sizes?
On shorter trays (up to 1400mm), a full-length fall to an end drain is manageable and works well in most alcove installations. On longer trays of 1600mm and 1800mm, the fall distance to an end drain becomes steeper and more noticeable underfoot, and harder to tile evenly with large-format porcelain or stone. The offset drain position was designed specifically for these longer trays to distribute the fall more evenly across the floor.
Do I need to overboard my floor before installing this tray former?
On timber joist floors, yes — overboarding is essential. The subfloor must be flat to within ±3mm over 2 metres and completely rigid. Overboard with 18mm plywood or 10mm Taurus tile backer board. On concrete floors, overboarding is not always required but the floor must still be flat, sound, and free from movement. Taurus recommend 10mm tile backer board on all floor types as best practice.
Can this tray former be cut down if my wet room space is slightly smaller than a standard size?
Yes. The tray can be trimmed with a hand saw to reduce length and width. Taurus advise removing no more than 80mm from any single edge to avoid compromising the foam's structural zone or surface integrity near the edge. Always dry-fit first and mark cut lines carefully. When trimming length, check that the cut does not bring the new end closer than is practical to the drain channel position.
What tile thickness can be used on this tray former?
Standard ceramic and porcelain tiles up to approximately 20mm thick are suitable. The waste trap height must be set at installation to account for both tile thickness and adhesive bed depth so the finished tile surface finishes flush with the drain channel cover plate. Most tile and adhesive combinations total between 10mm and 18mm. Confirm your tile and adhesive thickness with your tiler before setting the trap during tray bedding.
Do I need to apply a waterproof membrane to the tray surface before tiling?
The XPS core is inherently waterproof but all joints, edges, and the tray-to-wall perimeter must be sealed with Pro-Seal compound and waterproof tape before tiling. These junction zones are where water can penetrate and must be thoroughly treated. The tray surface itself does not require a separate waterproofing membrane — tile directly to the cementitious coating using flexible adhesive once all joints are sealed.
Can this tray former be installed on a concrete floor without overboarding?
Yes, provided the concrete floor is flat (±3mm over 2m), fully cured, sound, and free from movement, contamination, or rising damp. Wood floor primer is not required on concrete. Apply Fix-KST directly to the concrete as a full bed using a notched trowel, then lower the tray into position. Any unevenness or soft spots in the concrete must be remedied before installation.
Original: $601.95
-65%$601.95
$210.68More Images


Taurus Wet Room Linear Tray Former | 30mm Level Access | XPS Tileable | Multiple Sizes | End Drain
30mm Level Access XPS Foam Core Tileable Surface End & Offset Drain Options Timber & Screed Tray Former Only
The Taurus Wet Room Linear Tray Former is a 30mm-deep level-access shower base designed for the UK overboarded-floor wet room market. Built from XPS (extruded polystyrene) foam with a cementitious, fibreglass-reinforced tile-ready surface, it is lightweight yet rigid — able to support tiles and the weight of occupants without flex or deflection. The pre-formed linear drain channel directs water to a single drain line, making tiling considerably simpler than a four-way fall to a central point drain. Available in seven size and drain configurations across two series: the LT32 series with a 300mm end drain (channel flush with one short end), and the LT34 series with a 600mm offset drain available on the 1600mm and 1800mm-long trays. Tray former only — installation kit, waste trap, and drain cover plate are sold separately.
Variant Guide — All Sizes & Drain Configurations
All variants are 30mm tray height. END drain variants have the linear channel flush with one short end of the tray. OFFSET drain variants have a 600mm channel positioned inset from one end along the long dimension — available on 1600×900 and 1800×900 only. See the "End Drain vs Offset Drain" section below before choosing.
| Tray Size (L×W) | Drain Length | Drain Position | Tray Area | MPN |
|---|---|---|---|---|
| 900 × 900mm | 300mm | END | 0.81 m² | LT320909 |
| 1200 × 900mm | 300mm | END | 1.08 m² | LT321209 |
| 1200 × 1200mm | 300mm | END | 1.44 m² | LT321212 |
| 1400 × 900mm | 300mm | END | 1.26 m² | LT321409 |
| 1600 × 900mm | 300mm | END | 1.44 m² | LT321609 |
| 1600 × 900mm | 600mm | OFFSET | 1.44 m² | LT341609 |
| 1800 × 900mm | 600mm | OFFSET | 1.62 m² | LT341809 |
End Drain vs Offset Drain — Which Do I Need?
The drain position determines where the pre-formed fall directs water, how the waste pipe must be routed beneath the floor, and how the tiled floor will look once complete. The fall is factory-moulded into the tray — it cannot be changed on site. Choose the correct variant before ordering.
🟢 End Drain — LT32 Series
The 300mm channel sits flush with one short end of the tray. The entire floor surface falls in a single direction towards that end wall. The waste pipe exits at the tray end and runs from there under the floor.
Best for: Alcove wet rooms where the drain-end wall is accessible for waste routing. All five sizes from 900×900 up to 1600×900. Simple, single-direction fall — easiest to tile evenly.
🔵 Offset Drain — LT34 Series
The 600mm channel is positioned inset from one end along the long dimension — not flush with the tray edge. Water falls from both sides of the channel towards it, halving the maximum fall distance compared to a full end drain on the same tray length.
Best for: Larger trays (1600mm, 1800mm) where a full end-to-end fall would be steep or difficult to tile. The offset position shortens each fall leg and the 600mm channel gives greater flow collection. Available on 1600×900 and 1800×900 only. Waste pipe exits along a long side edge — confirm pipe routing before ordering.
💡 Key decision — waste pipe routing
The drain position dictates where the waste pipe emerges beneath the floor. For an end drain, the pipe exits at the tray end — typically running along a wall or between joists towards a soil stack. For an offset drain, the pipe exits along one long edge of the tray. Confirm your joist direction and the intended waste run route before ordering, as this affects which variant is practical in your specific floor construction.
What Is a Linear Tray Former?
A wet room tray former is a pre-formed XPS foam base that replaces a traditional acrylic or stone resin shower tray. Rather than sitting on adjustable legs, the former is bedded directly into the floor build-up on top of the overboarded subfloor, so the finished tiled surface sits level with the surrounding bathroom floor. The drainage gradient is factory-moulded into the foam — there is no need to form a screed fall on site. Tiles are applied directly to the cementitious surface using standard flexible tile adhesive.
The linear drain design concentrates drainage into a single channel rather than a central point waste requiring a four-way fall. This is a significant practical advantage when tiling: the floor surface falls in one direction (or two symmetrical directions for the offset variant), making it far simpler to lay large-format tiles without complex cutting at every edge or uneven grout joints across the floor plane.
Key Features
What's In the Box
This listing is for the tray former only. The box contains:
- 1× Taurus XPS wet room linear tray former (size and drain configuration as selected)
To complete the installation you will also need — all sold separately:
- Tray Former Installation Kit — Fix-KST bedding adhesive, Pro-Seal waterproof compound, waterproof tape, internal corner pieces, wood floor primer, brush, and notched trowel
- Linear Waste Trap — match to your drain channel length (300mm trap for end drain trays; 600mm linear trap for offset drain trays)
- Linear Drain Cover Plate — stainless steel, tileable, or decorative finish; match drain length and chosen finish
- Tile Backer Board (recommended) — 10mm Taurus floor backer boards to overboard the subfloor before bedding
- Tile adhesive, grout, and silicone — flexible adhesive for tiling; silicone for the perimeter movement joint
Installation Overview
- Prepare the subfloor: The floor must be flat (±3mm over 2m), sound, and clean. On timber floors, overboard with 18mm plywood or 10mm Taurus tile backer board fixed at 150mm centres. Apply wood floor primer to all timber surfaces — this step must not be omitted.
- Plan waste pipe routing: The waste pipe (40mm or 50mm to match your chosen trap) must be in position before the tray is bedded. For an end drain tray the pipe exits at the short end; for an offset drain tray the pipe exits along one long side edge. Confirm routing is practical with your floor construction and joist direction before ordering.
- Dry-fit and mark: Position the tray former in the opening to confirm fit and mark the drain channel position relative to the waste pipe. Check adequate clearance beneath the tray for the trap body.
- Set the trap height: Fit the waste trap to the drain channel and set the trap height to account for your planned tile and adhesive thickness. This is the most critical step — the height cannot be adjusted after bedding.
- Apply Fix-KST and bed the tray: Mix and apply Fix-KST to the full subfloor area using a notched trowel (full-bed only — no spot-bedding). Lower the tray onto the adhesive, press down firmly and evenly across the whole surface, and confirm the fall with a spirit level. Allow to cure fully before tiling (typically 24 hours).
- Waterproof all joints: Apply Pro-Seal compound over all joints, seams, and tray-to-wall junctions using the supplied waterproof tape. All joints must be fully sealed before any tiling begins.
- Tile the surface: Apply tiles using flexible adhesive, working from the drain channel outwards. Leave the perimeter joint between tray tiles and wall tiles clear of grout — this is a movement joint.
- Silicone perimeter: Once grouting is complete, fill the full perimeter movement joint with flexible sanitary silicone. This joint must never be grouted.
⚠️ Critical Installation Notes
Always use a full-bed of Fix-KST — spot-bedding causes the XPS to flex under load, cracking tile adhesive and grout over time. On timber floors, wood floor primer must be applied before Fix-KST — the most commonly skipped step and the most frequent cause of adhesion failure. Set trap height before bedding — it cannot be changed afterwards. The perimeter joint between tray tiles and wall tiles must always be silicone, never grout.
Technical Specifications
| Specification | Detail |
|---|---|
| Product Type | Wet room level-access tray former |
| Drain Style | Linear (channel drain) |
| Tray Height | 30mm |
| Core Material | XPS (extruded polystyrene) foam |
| Surface | Cementitious, fibreglass-reinforced, tile-ready |
| LT32 Series — Drain | 300mm end drain — channel flush with short end; single-direction fall across full tray length |
| LT34 Series — Drain | 600mm offset drain — channel inset from end along long dimension; two-directional symmetrical fall. Available 1600×900 and 1800×900 only |
| Subfloor Compatibility | Timber (overboarded) and concrete/screed |
| Can Be Cut to Size | Yes — hand saw; max 80mm reduction per edge |
| UFH Compatible | Yes (see installation notes) |
| Guarantee | 15 years |
| Installation Kit | Sold separately |
| Waste Trap | Sold separately |
| Drain Cover Plate | Sold separately |
| Brand | Taurus |
Frequently Asked Questions
What is the practical difference between the end drain and offset drain on a 1600×900mm tray?
On the end drain variant (LT321609), water falls across the full 1600mm length of the tray towards the 300mm channel at one short end. On the offset drain variant (LT341609), the 600mm channel is set inset from one end and the tray surface falls from both sides towards it — so the maximum fall distance is roughly half the tray length. The offset variant creates a gentler, more distributed gradient that can be easier to tile with large-format tiles and reduces visible slope when viewed along the floor. However, the offset drain requires the waste pipe to exit along a long side edge rather than at the end wall, which affects installation planning.
Why is the offset drain only available on the 1600×900 and 1800×900 sizes?
On shorter trays (up to 1400mm), a full-length fall to an end drain is manageable and works well in most alcove installations. On longer trays of 1600mm and 1800mm, the fall distance to an end drain becomes steeper and more noticeable underfoot, and harder to tile evenly with large-format porcelain or stone. The offset drain position was designed specifically for these longer trays to distribute the fall more evenly across the floor.
Do I need to overboard my floor before installing this tray former?
On timber joist floors, yes — overboarding is essential. The subfloor must be flat to within ±3mm over 2 metres and completely rigid. Overboard with 18mm plywood or 10mm Taurus tile backer board. On concrete floors, overboarding is not always required but the floor must still be flat, sound, and free from movement. Taurus recommend 10mm tile backer board on all floor types as best practice.
Can this tray former be cut down if my wet room space is slightly smaller than a standard size?
Yes. The tray can be trimmed with a hand saw to reduce length and width. Taurus advise removing no more than 80mm from any single edge to avoid compromising the foam's structural zone or surface integrity near the edge. Always dry-fit first and mark cut lines carefully. When trimming length, check that the cut does not bring the new end closer than is practical to the drain channel position.
What tile thickness can be used on this tray former?
Standard ceramic and porcelain tiles up to approximately 20mm thick are suitable. The waste trap height must be set at installation to account for both tile thickness and adhesive bed depth so the finished tile surface finishes flush with the drain channel cover plate. Most tile and adhesive combinations total between 10mm and 18mm. Confirm your tile and adhesive thickness with your tiler before setting the trap during tray bedding.
Do I need to apply a waterproof membrane to the tray surface before tiling?
The XPS core is inherently waterproof but all joints, edges, and the tray-to-wall perimeter must be sealed with Pro-Seal compound and waterproof tape before tiling. These junction zones are where water can penetrate and must be thoroughly treated. The tray surface itself does not require a separate waterproofing membrane — tile directly to the cementitious coating using flexible adhesive once all joints are sealed.
Can this tray former be installed on a concrete floor without overboarding?
Yes, provided the concrete floor is flat (±3mm over 2m), fully cured, sound, and free from movement, contamination, or rising damp. Wood floor primer is not required on concrete. Apply Fix-KST directly to the concrete as a full bed using a notched trowel, then lower the tray into position. Any unevenness or soft spots in the concrete must be remedied before installation.
Product Information
Product Information
Shipping & Returns
Shipping & Returns
Description
30mm Level Access XPS Foam Core Tileable Surface End & Offset Drain Options Timber & Screed Tray Former Only
The Taurus Wet Room Linear Tray Former is a 30mm-deep level-access shower base designed for the UK overboarded-floor wet room market. Built from XPS (extruded polystyrene) foam with a cementitious, fibreglass-reinforced tile-ready surface, it is lightweight yet rigid — able to support tiles and the weight of occupants without flex or deflection. The pre-formed linear drain channel directs water to a single drain line, making tiling considerably simpler than a four-way fall to a central point drain. Available in seven size and drain configurations across two series: the LT32 series with a 300mm end drain (channel flush with one short end), and the LT34 series with a 600mm offset drain available on the 1600mm and 1800mm-long trays. Tray former only — installation kit, waste trap, and drain cover plate are sold separately.
Variant Guide — All Sizes & Drain Configurations
All variants are 30mm tray height. END drain variants have the linear channel flush with one short end of the tray. OFFSET drain variants have a 600mm channel positioned inset from one end along the long dimension — available on 1600×900 and 1800×900 only. See the "End Drain vs Offset Drain" section below before choosing.
| Tray Size (L×W) | Drain Length | Drain Position | Tray Area | MPN |
|---|---|---|---|---|
| 900 × 900mm | 300mm | END | 0.81 m² | LT320909 |
| 1200 × 900mm | 300mm | END | 1.08 m² | LT321209 |
| 1200 × 1200mm | 300mm | END | 1.44 m² | LT321212 |
| 1400 × 900mm | 300mm | END | 1.26 m² | LT321409 |
| 1600 × 900mm | 300mm | END | 1.44 m² | LT321609 |
| 1600 × 900mm | 600mm | OFFSET | 1.44 m² | LT341609 |
| 1800 × 900mm | 600mm | OFFSET | 1.62 m² | LT341809 |
End Drain vs Offset Drain — Which Do I Need?
The drain position determines where the pre-formed fall directs water, how the waste pipe must be routed beneath the floor, and how the tiled floor will look once complete. The fall is factory-moulded into the tray — it cannot be changed on site. Choose the correct variant before ordering.
🟢 End Drain — LT32 Series
The 300mm channel sits flush with one short end of the tray. The entire floor surface falls in a single direction towards that end wall. The waste pipe exits at the tray end and runs from there under the floor.
Best for: Alcove wet rooms where the drain-end wall is accessible for waste routing. All five sizes from 900×900 up to 1600×900. Simple, single-direction fall — easiest to tile evenly.
🔵 Offset Drain — LT34 Series
The 600mm channel is positioned inset from one end along the long dimension — not flush with the tray edge. Water falls from both sides of the channel towards it, halving the maximum fall distance compared to a full end drain on the same tray length.
Best for: Larger trays (1600mm, 1800mm) where a full end-to-end fall would be steep or difficult to tile. The offset position shortens each fall leg and the 600mm channel gives greater flow collection. Available on 1600×900 and 1800×900 only. Waste pipe exits along a long side edge — confirm pipe routing before ordering.
💡 Key decision — waste pipe routing
The drain position dictates where the waste pipe emerges beneath the floor. For an end drain, the pipe exits at the tray end — typically running along a wall or between joists towards a soil stack. For an offset drain, the pipe exits along one long edge of the tray. Confirm your joist direction and the intended waste run route before ordering, as this affects which variant is practical in your specific floor construction.
What Is a Linear Tray Former?
A wet room tray former is a pre-formed XPS foam base that replaces a traditional acrylic or stone resin shower tray. Rather than sitting on adjustable legs, the former is bedded directly into the floor build-up on top of the overboarded subfloor, so the finished tiled surface sits level with the surrounding bathroom floor. The drainage gradient is factory-moulded into the foam — there is no need to form a screed fall on site. Tiles are applied directly to the cementitious surface using standard flexible tile adhesive.
The linear drain design concentrates drainage into a single channel rather than a central point waste requiring a four-way fall. This is a significant practical advantage when tiling: the floor surface falls in one direction (or two symmetrical directions for the offset variant), making it far simpler to lay large-format tiles without complex cutting at every edge or uneven grout joints across the floor plane.
Key Features
What's In the Box
This listing is for the tray former only. The box contains:
- 1× Taurus XPS wet room linear tray former (size and drain configuration as selected)
To complete the installation you will also need — all sold separately:
- Tray Former Installation Kit — Fix-KST bedding adhesive, Pro-Seal waterproof compound, waterproof tape, internal corner pieces, wood floor primer, brush, and notched trowel
- Linear Waste Trap — match to your drain channel length (300mm trap for end drain trays; 600mm linear trap for offset drain trays)
- Linear Drain Cover Plate — stainless steel, tileable, or decorative finish; match drain length and chosen finish
- Tile Backer Board (recommended) — 10mm Taurus floor backer boards to overboard the subfloor before bedding
- Tile adhesive, grout, and silicone — flexible adhesive for tiling; silicone for the perimeter movement joint
Installation Overview
- Prepare the subfloor: The floor must be flat (±3mm over 2m), sound, and clean. On timber floors, overboard with 18mm plywood or 10mm Taurus tile backer board fixed at 150mm centres. Apply wood floor primer to all timber surfaces — this step must not be omitted.
- Plan waste pipe routing: The waste pipe (40mm or 50mm to match your chosen trap) must be in position before the tray is bedded. For an end drain tray the pipe exits at the short end; for an offset drain tray the pipe exits along one long side edge. Confirm routing is practical with your floor construction and joist direction before ordering.
- Dry-fit and mark: Position the tray former in the opening to confirm fit and mark the drain channel position relative to the waste pipe. Check adequate clearance beneath the tray for the trap body.
- Set the trap height: Fit the waste trap to the drain channel and set the trap height to account for your planned tile and adhesive thickness. This is the most critical step — the height cannot be adjusted after bedding.
- Apply Fix-KST and bed the tray: Mix and apply Fix-KST to the full subfloor area using a notched trowel (full-bed only — no spot-bedding). Lower the tray onto the adhesive, press down firmly and evenly across the whole surface, and confirm the fall with a spirit level. Allow to cure fully before tiling (typically 24 hours).
- Waterproof all joints: Apply Pro-Seal compound over all joints, seams, and tray-to-wall junctions using the supplied waterproof tape. All joints must be fully sealed before any tiling begins.
- Tile the surface: Apply tiles using flexible adhesive, working from the drain channel outwards. Leave the perimeter joint between tray tiles and wall tiles clear of grout — this is a movement joint.
- Silicone perimeter: Once grouting is complete, fill the full perimeter movement joint with flexible sanitary silicone. This joint must never be grouted.
⚠️ Critical Installation Notes
Always use a full-bed of Fix-KST — spot-bedding causes the XPS to flex under load, cracking tile adhesive and grout over time. On timber floors, wood floor primer must be applied before Fix-KST — the most commonly skipped step and the most frequent cause of adhesion failure. Set trap height before bedding — it cannot be changed afterwards. The perimeter joint between tray tiles and wall tiles must always be silicone, never grout.
Technical Specifications
| Specification | Detail |
|---|---|
| Product Type | Wet room level-access tray former |
| Drain Style | Linear (channel drain) |
| Tray Height | 30mm |
| Core Material | XPS (extruded polystyrene) foam |
| Surface | Cementitious, fibreglass-reinforced, tile-ready |
| LT32 Series — Drain | 300mm end drain — channel flush with short end; single-direction fall across full tray length |
| LT34 Series — Drain | 600mm offset drain — channel inset from end along long dimension; two-directional symmetrical fall. Available 1600×900 and 1800×900 only |
| Subfloor Compatibility | Timber (overboarded) and concrete/screed |
| Can Be Cut to Size | Yes — hand saw; max 80mm reduction per edge |
| UFH Compatible | Yes (see installation notes) |
| Guarantee | 15 years |
| Installation Kit | Sold separately |
| Waste Trap | Sold separately |
| Drain Cover Plate | Sold separately |
| Brand | Taurus |
Frequently Asked Questions
What is the practical difference between the end drain and offset drain on a 1600×900mm tray?
On the end drain variant (LT321609), water falls across the full 1600mm length of the tray towards the 300mm channel at one short end. On the offset drain variant (LT341609), the 600mm channel is set inset from one end and the tray surface falls from both sides towards it — so the maximum fall distance is roughly half the tray length. The offset variant creates a gentler, more distributed gradient that can be easier to tile with large-format tiles and reduces visible slope when viewed along the floor. However, the offset drain requires the waste pipe to exit along a long side edge rather than at the end wall, which affects installation planning.
Why is the offset drain only available on the 1600×900 and 1800×900 sizes?
On shorter trays (up to 1400mm), a full-length fall to an end drain is manageable and works well in most alcove installations. On longer trays of 1600mm and 1800mm, the fall distance to an end drain becomes steeper and more noticeable underfoot, and harder to tile evenly with large-format porcelain or stone. The offset drain position was designed specifically for these longer trays to distribute the fall more evenly across the floor.
Do I need to overboard my floor before installing this tray former?
On timber joist floors, yes — overboarding is essential. The subfloor must be flat to within ±3mm over 2 metres and completely rigid. Overboard with 18mm plywood or 10mm Taurus tile backer board. On concrete floors, overboarding is not always required but the floor must still be flat, sound, and free from movement. Taurus recommend 10mm tile backer board on all floor types as best practice.
Can this tray former be cut down if my wet room space is slightly smaller than a standard size?
Yes. The tray can be trimmed with a hand saw to reduce length and width. Taurus advise removing no more than 80mm from any single edge to avoid compromising the foam's structural zone or surface integrity near the edge. Always dry-fit first and mark cut lines carefully. When trimming length, check that the cut does not bring the new end closer than is practical to the drain channel position.
What tile thickness can be used on this tray former?
Standard ceramic and porcelain tiles up to approximately 20mm thick are suitable. The waste trap height must be set at installation to account for both tile thickness and adhesive bed depth so the finished tile surface finishes flush with the drain channel cover plate. Most tile and adhesive combinations total between 10mm and 18mm. Confirm your tile and adhesive thickness with your tiler before setting the trap during tray bedding.
Do I need to apply a waterproof membrane to the tray surface before tiling?
The XPS core is inherently waterproof but all joints, edges, and the tray-to-wall perimeter must be sealed with Pro-Seal compound and waterproof tape before tiling. These junction zones are where water can penetrate and must be thoroughly treated. The tray surface itself does not require a separate waterproofing membrane — tile directly to the cementitious coating using flexible adhesive once all joints are sealed.
Can this tray former be installed on a concrete floor without overboarding?
Yes, provided the concrete floor is flat (±3mm over 2m), fully cured, sound, and free from movement, contamination, or rising damp. Wood floor primer is not required on concrete. Apply Fix-KST directly to the concrete as a full bed using a notched trowel, then lower the tray into position. Any unevenness or soft spots in the concrete must be remedied before installation.